
Welcome to the WinJewel Program.
This program was designed using Microsoft Windows by a jeweler especially
for use by any retail jewelry store.
It is meant to be easy to use and to solve many of the common problems in
keeping track of everything in the store. It is not designed to be an all
things to all people bookkeeping program but to face the problems that are
unique to the Jewelry Industry.
The operation of a jewelry store is an art. That art can be more creative and
more effective if accurate records of what has happened and what is happening
are available to the stores management.
To run the WinJewel program it helps if you are comfortable with Microsoft
Windows. Even if you are not familiar with the Windows system, you will find
this system is very easy to learn. Ease of learning is the reason that
Microsoft Windows is the largest selling computer program of all time.
The WinJewel Program comes in either the 3.5" 1.44 MB format floppy disk
or CD. If you didn't receive the format of your choice, please call or write us
at:
The WinJewel Co.
(360) 658-9875
or reach us by Email -- winjewel@msn.com
 HARDWARE REQUIREMENTS
Before you start to run the program in your computer, be sure that you
have the following requirements:
(1) IBM compatible computer with 386, 486 or Pentium (586) CPU.
(2) At least 8 Meg of RAM (Suggested 32 Meg - Your local computer store can add
this to your system and you will find it will increase the speed that your
computer runs windows even if you just have a 386.)
(3) A hard drive with at least 30 Megabytes of free space. (More disk space
would be required for larger volume stores.)
(4) A Color or Black & White Monitor. We suggest a color monitor. If you
are using a black and white monitor you should go to the "Reports"
screen and choose "System Settings". Then click on "Set
Background Colors for each screen". Then click on "Set All Colors to
Grey". This will make the screen easier to read on a black and white
monitor.
(5) Microsoft Windows (3.1 or higher) & compatible Mouse.
(If you are running WinJewel version 4.0 or later you need a 32-bit version of
Windows such as Windows 95, 98 or NT)
(6) A Windows compatible Printer. The "Driver" for your printer must
be a one that was written to work with the particular version of Windows that
you are running. This is very important. Unlike most word-processing programs,
WinJewel does not have it's own print drivers but
relies on the driver that is supplied with the particular printer that you are
using. The one exception is if you are using an Eltron,
Allegro or Zebra printer for printing tags. WinJewel does have its own built-in
drivers for these three printers when printing price tags.
(7) If you are running the "multi-user" version of WinJewel you will
need to have a working network system of some kind to network your computers
together. It is beyond the scope of this manual to discuss all of the
possibilities of computer networks. It is probably best if you are not familiar
with networks and have no local computer expert to help you with network setup
to call us at WinJewel and we will try to advise you. Once you have a properly
working "Local Area Network" (abbreviated with the acronym
"LAN") then the multi-user version of WinJewel will be able to handle
all of the file sharing, file locking and record locking that is necessary for
the files within WinJewel. In most cases the built in network capabilities of
the Windows operating system are adequate without any other software being
necessary. You will need cabling and a network card installed on each computer.
(8) If you are running the "Multi-Store" version of WinJewel you will
need a modem and a phone line hooked to at least one computer in each store. A
modem is suggested for single store installations also so that the WinJewel
support people can adjust your system from their computers using the support
software that WinJewel provides. We also suggest that you use your modem to go
to the World Wide Web and visit our website often to download the latest
version of WinJewel. Our address on the Web is www.winjewel.com
Overview of working with WINJEWEL and MICROSOFT WINDOWS
Use only what you want of WinJewel. By this we mean you don't have to use all
functions of the program. It is designed to be modular and to work with as much
of the program as you feel will help your individual store.
Start with only one feature and slowly add features one by one. This will be
easier on you and your staff. As an example you might start by entering your
inventory. Then you may want to add writing sales slips. Then you could add
purchase orders when you are comfortable with sales slips. Etc. In other words
take it slow and you will not have the trauma in your store that is caused by
trying to convert over to a computer bookkeeping system all at one time.
We have written WinJewel in MICROSOFT WINDOWS. Any item on the screen at any
time can be pointed to with the mouse. Once you point to an item you can press
the left button on the mouse and that item will be chosen. You will get used to
the different items that you will see on the screen. There are really only six
types of items that you will find on the screen. Each is shaped and colored
like other things of the same type. Once you have mastered these six objects
then you can do anything with the WinJewel program. Here is a list and example
of each of the 6 types of items:
An ICON

An Icon indicates a choice of what you want the computer to do at any time.
There is always a row of these at the top of the screen. Point to the Icon and
click the left button on the mouse. (This is called a click. Always click with
the left button unless instructions specifically state to use another button.)
A GREY BUTTON
 A gray button will help you to choose an option or a
procedure. Point to the bar with the mouse and click.
A gray button will help you to choose an option or a
procedure. Point to the bar with the mouse and click.
A DATA BOX
 A data box will display information for you. If the
cursor is blinking in it or the box has a red border around it, it is said to
have the "Focus". This means that you can type information on the
keyboard and it will be put in that box. You can choose a box ("give it
the focus") by pointing at the box and clicking the mouse.
A data box will display information for you. If the
cursor is blinking in it or the box has a red border around it, it is said to
have the "Focus". This means that you can type information on the
keyboard and it will be put in that box. You can choose a box ("give it
the focus") by pointing at the box and clicking the mouse.
Once it is chosen it will respond to whatever you enter using the keyboard
keys. You can use the ENTER or TAB key at the end of entering or changing the
information in a data box. The focus will go to the next box.
It is possible to put a longer entry into a data box than will show in that
box. When the program saves this information, it will sometimes be cut off at
the maximum length allowed for that particular information. Experiment with the
BACKSPACE, DELETE and the CURSOR keys to see how they effect the information in
the box. Remember that each box, no matter where in the program, will respond
the same.
A DROP DOWN BOX
 A drop-down list box has a small arrow to the
right. If you click on that arrow, a list of possible entries for that box will
drop down from the box. If you point to any entry and click, that entry will be
entered into the box. If the list is longer than the box can show at one time,
a bar with two arrows will appear on the right of the box. Use this bar and
arrows to see more of the list.
A drop-down list box has a small arrow to the
right. If you click on that arrow, a list of possible entries for that box will
drop down from the box. If you point to any entry and click, that entry will be
entered into the box. If the list is longer than the box can show at one time,
a bar with two arrows will appear on the right of the box. Use this bar and
arrows to see more of the list.
A Drop-Down Box can also be typed into instead of choosing something from the
list with the mouse.
A LIST BOX
A list box may have a list of items from which to
choose. If the list is longer than the box can show at one time, a bar with two
arrows will appear on the right of the box. Use this bar and arrows to see more
of the list. Point and click at the item that you want to choose.
Many of the list boxes have a long gray button along the left edge of the box.
If you see one of these and click on it you will see the box expand to full
screen size. This will make it possible to see more information in the box. If
you click again on the same long gray button, the box will return to its regular
size.
A CHOICE BUTTON
 A choice button will
allow you to choose one choice from a series of choices. Point and click on the
small round circle just to the left of the label. The button will turn dark to
show that it has been chosen. Any previous buttons that are dark will be
canceled and will turn white to indicate that.
A choice button will
allow you to choose one choice from a series of choices. Point and click on the
small round circle just to the left of the label. The button will turn dark to
show that it has been chosen. Any previous buttons that are dark will be
canceled and will turn white to indicate that.
That's the list of 6. Now when you see one of these items you will know what to
do with it.
THINGS TO DO TO GET READY
1 - Make a list of departments.
These should be logical divisions of type of merchandise. Each department name
must have the first 3 letters different from any other department name because
the computer stores only these three letters. You are allowed up to 30
departments in WinJewel normally. If you feel that you need more than this,
just let us know and we can adjust your copy of the program to any number of
departments. The program provides a sample list.
2 - Make a list of general ledger accounts.
Normally these will be on your current balance sheet from your accountant. You
should use the list that you have been using. A 3 to 5 digit number must be
assigned to each account. If you want these accounts subtotaled in groups when
printed you must start each sub-group with a different number range. The
program provides a sample list.
3 - Make a list of all current suppliers.
This list can be added too easily later, so if you miss some it is not
important. Each supplier needs to be assigned a 3-digit number between 001 and
998. Number 999 is reserved to use when you want to remove an item from
inventory. Try to make your starting numbers for each supplier be in increments
of 5. Example: 005, 010, 015, 020, etc. Assign your major suppliers to even 100
numbers. Example: 100,200,300,400, etc. This makes it easier to remember. Memo
merchandise is treated as a separate supplier. Add 1 to the number of a regular
supplier to indicate memo items. Example: Supplier number 500 would also have
501 as a number for memo merchandise from the same supplier.
4 - Make a list of each employee and a password for each.
This list is easy to add to, change or remove entries. Passwords should be kept
short. No more than 8 letters and/or numbers.
SALES SCREEN
 Example of writing a sales slip:
Click once on the "Sales Slip" icon. This will display the
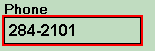
"Sales Slip Form". The cursor is blinking in the "Phone"
box.
Enter a phone number or the first few letters of the customer’s last name then
press the "Enter" key. If the phone number or a match to how many
letters of the customer’s last name is already in the computer, a list of
matches will be filled into the large white box at the bottom. If you click on
any match, the full name and address will be filled in on the screen. If the
phone number or name is new, enter the balance of the customer’s information to
add a new customer. The cursor will be blinking in the "Salesperson"
box.
If this is a new customer to the computer, be sure to fill all of the
information about this customer.
IMPORTANT - Be careful not to enter the same customer twice. If you do,
you may later be confused as to the total sales, repairs, notes and appraisals
that you have done with this customer. This is an important thing to note on all
screens that new customers can be entered.
Click once on the small arrow to the right of the salesperson box. This will
display a list of the salesperson names.
Point to the salesperson that you want to designate on the list and click. The
name of that salesperson will now be in the box and the list will disappear. If
you wanted to change the name you would click on the arrow again. The cursor
should now be blinking on the first "Stock Number" box.
Scan the barcode of the item that you want to sell. If you do not have a
barcode scanner.
If you do
not have barcodes on your stock tickets then enter the first three digits of
the stock number then press the Enter key. The cursor will now be blinking in
the second "Stock Number" box. Enter the next 5 digits of the stock
number then press the Enter key. If the computer finds a match for the stock
number the "Description", "Price" and
"Department" boxes will be filled in automatically. If no match is
found you should enter these yourself.
You must now choose from the buttons along the right side of the screen. These
buttons are labeled "Cash", "Check", "Bank Card",
"Charge", "Payment" and "Layaway". Click on the
small circle just to the left of each label. Notice how the last one that you
clicked is black. Don't choose "Payment" at this time because the
"Description" box will be altered to read "Payment" and the
"Department" box will be altered to read "Payment".
Now you must click one of the two gray bars that say "End Line Tax"
and "End Line No Tax". If you choose "End Line Tax" the
sales tax will be calculated and shown on the sales item.
After you choose an "End Line" button, the cursor will be blinking
again in the first box of the "Stock Number" boxes. If we wanted to
enter another item for this sales slip, we would enter the numbers now. If we
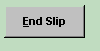
are finished with this customer, just point to the "End Slip" bar and
click.
A window will appear in the center of the screen to let you enter the exact way
the customer will pay for the item(s). Point and click with the mouse on any
item that you want to change, then click on the last line of the window (the
one that says, "finished") when you have
everything reading the way that you want. Make sure that your printer is turned
on and supplied with paper. The sales slip will now print. The screen will
reset for the next sales slip.
![]() More features of
the Sales form:
More features of
the Sales form:
You can bring up a customer by last name or just the first few letter of the
last name if you prefer. Click on the "Last Name" box. Type the
letters "ST". The large white box at the bottom of the screen will
display a list of all customers that are in the file at this time that start
with "ST". Click on the name in the box that you want. The customer
information boxes at the top of the screen will be filled in. You can change
any of these boxes by clicking the box and then typing what you want into that
box.
Anytime that you have a customer filled in on the screen, you can make a note
on this account or see the notes on an account by clicking on one of the two
gray bars labeled "See Note" or "Make Note". Any number of
notes can be made on any account. Experiment with these buttons.
If you want to write a sales slip for a repair envelope, enter E for the
supplier number then enter the envelope number in the number box. An even
faster shortcut to write up a repair envelope is to enter "E" into
the phone box. The "E" will be automatically transferred to the first
stock number box and you can enter the envelope number into the second stock
number box. Everything that was entered when the envelope was made out will be
filled in on the screen, including the customer's information, description,
price, department and sales- person.
INVENTORY
Example of entering new inventory:
Click on the inventory icon. The Inventory form will appear on the screen.
Click on the gray button in the lower left corner of the screen that is labeled
"New Invoice". You will be asked for the Invoice Number and Invoice
date. This will start accumulating inventory for that invoice.
You will notice that a list of the suppliers that have been entered will be in
the large box at the right of the screen. If the list is longer than can be
shown in the box, a slide bar will appear on the right side of the box. You can
click on the up or down arrow to see the rest of the list.
Click on the line with the name of the supplier of the inventory that you want
to enter. The supplier number will be entered into the "Supplier" box
and the next available number will be entered into the "Stock Number"
box. You will notice that the "Invoice Number" and "Date
Purchased" boxes are also filled in. The cursor should now be in the
"Description" box.
Enter the description of the item then push the Enter key. Remember that what
you put here will later be on the sales slip when you enter this number when
filling out a sales slip. The cursor will now be in the "Serial
Number" box.
Enter the serial number of the item if it has one. If it does not have one then
just press the "Enter" key to go to the next box.
Enter the size of the center stone in carats then push the Enter key. (Example:
.22 would be a twenty-two pointer) The cursor will now be blinking in the
"Total Weight" box.
Enter the total weight of the side stones. (Note: This is not the total weight
of all stones unless there is no center stone.)
Enter the Clarity, Color, Cut and Shape information. You can leave these boxes
empty if you want to. The cursor should now be in the "Reorder
Number" box.
Enter the number that the factory would need to reorder this style. Then press
the Enter key. The cursor will now be in the "Grams" box.
Enter the weight of the gold in grams. Then press the Enter key. The cursor
should now be in the "Karat" box.
Enter the karat of the gold then press the Enter key. (Example: 14) Do not
follow the number with a "K". The cursor will now be in the
"Color" box.
Enter "Y" for yellow, "W" for white, "T" for
two-tone, "B" for
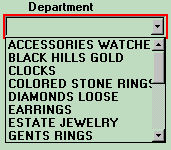
Click on the down arrow to open a list of the departments. If there are more
departments than can be seen at one time in the box, a slide bar will be at the
right of the box. You can see more of the list by clicking on the up arrow at
the top of the bar or the down arrow at the bottom of the bar. Point to the department name that you want and click. The
list will disappear; the name chosen will be in the "Department" box.
The "Invoice Number" and "Date Purchased" boxes should
already be filled in so go to the "Cost" box and enter the cost of
the item. Then press the Enter key. (Note: do not use the "$" dollar
sign.) The cost will be converted to code by the computer. If you want to check
to see what that code represents, click on the gray ""Decode"
bar. You will then need to press the Enter key again to move to the next field.
The cursor should now be in the "Retail" box.
Enter the retail that you want to have on this item then press the Enter key.
(Note: do not use the "$") If you want to use a fixed markup you can
enter "X" or "*" followed by the markup that you want to
take. Example: if your cost had been entered as 100.00 then and you entered
X2.5, the box would be filled in with 250.00. If you enter just an
"X" or a "*" then the retail would be entered based on the
cost percentage that was entered for the department that you have for this
item. (Average cost for any department is entered into the system when you
assign departments). The cursor will now be in the "Date Sold" box.
Unless this is a pre-sold item, you won't want to enter the next 3 boxes. The
one exception would be if you want to keep track of where in the store the item
will be kept. If you want to keep this information you can do one of two things.
1 - Enter the number of the case that you will be placing the item in. 2 -
Click on the "Location" gray button and you will see a map of the
store. Click on the case that you will be placing the item in and the number of
that case will be filled in for you.
Now you must decide if this is usually a sales taxable item. Point to and click
the small circle just to the left of the label for either "Taxable"
or "Non-Taxable". The default setting is taxable so if this item is
taxable then you don't need to click on "Non-Taxable".
You should now click on the gray "Save Item" bar. (Remember: if you
don't click on this bar all of your entries are not saved.) The boxes will all
be cleared and the cursor should now be back in the "Supplier box" so
that you can enter another item.
If you have more items to enter from this invoice, you can click on either the
"Next" gray button or the "Repeat Last" gray button. The
next available number will be filled in on the screen. If you choose the
"Next" button then only the "Supplier", "Stock
Number", "Invoice Number" and "Date Purchased" will be
filled in and you will enter all the rest. If you clicked on "Repeat
Last" then everything from the last item will be filled in except the
"Stock Number" will be the next available number.
You can change any box at this time by clicking that box and entering what you
want. When you are satisfied with all boxes, you can click on the gray
"Save Item" button.
Any time that you want to see or change any item that is already saved, just
enter the "Supplier" and "Stock Number" into the correct
boxes instead of clicking on a supplier name or the "Next" or
"Repeat Last" buttons. This will bring up that item and put its
information on the screen. You can change any box at this time by clicking that
box and entering what you want. When you are satisfied with all boxes, you can
click on the gray "Save Item" bar.
THE CUSTOMER
SCREEN

Building a good customer list is one of the best things that a jewelry store
can do. This ability to see quickly what the store has done with a customer is
great. You will know what letters have been sent to any customer, what
appraisals have been done, what has been purchased and for how much, and any
notes that you want to make on the customer.
Start by clicking on the Customer Icon. This will bring up the customer screen.
To enter a new customer all you have to do is fill in the information that you
want and click on the gray bar "SAVE CUST".
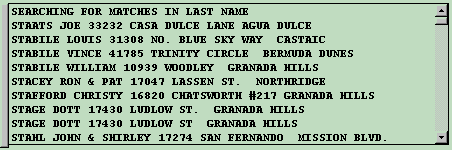
If you want to see or do something to an existing customer, there are two ways.
You can enter the phone number and press the Enter key. You can also enter the
last name into the last name box and press the Enter key. All of the names that
match the name or partial name that you entered will show up in the large list
box at the bottom of the screen. Click on the one that you want and the information
for that customer will be entered into the different boxes.
You can now change any box that you want and click on the "SAVE CUST"
gray bar.
If you want to see the notes that have been made on any
customer. First bring up the customer that you want as you did above and
click on the "SEE NOTES" gray bar. You will see a list of all notes
that have been made for this customer. The notes are in reverse order with the
newest list at the top. Also any letters or appraisals that have been done for
that customer will show with the date that each was done.
If you want to make a note on the customer that is on the screen, click on the
"MAKE NOTE" gray button. A blue outlined box will appear on the
screen. Type any note that you want to make and then click on "OK".
If you click on the "CANCEL" no note will be made.
If you want to see all sales whether Cash, Charge, Layaway, Bankcard, or
Payments you can click on the "SEE SLIPS" gray bar. These will be in
reverse order with the newest on top and each will be dated.
If you want to send a form letter or an Email to the customer that is on the
screen, you should click on the "SEND LETTER" gray bar. A list of the
letters that are currently in the file will appear in the larger box at the
bottom of the screen. Point to the one that you want to send and click. You
will be asked if you want to Print or Email the letter. The letter will
automatically be either printed ready to go into a window envelope or Emailed
to the customer if they have a valid Email address in the Email box. Also the
fact that the letter was Printed or Emailed will be
added to the note file for that customer and dated the current date.
For the Email to work
correctly you must have an Email server set up on the computer that you are
using and it must be connected to a phone line. The Email feature only works if
you have a Windows compliant Email program and it is correctly configured.
If you want to create or change a form letter you should click on the
"EDIT LETTER" gray bar. The WINJEWEL FORMLETTER WRITER will appear.
If you want to write a new letter you can click on the "NEW LETTER"
gray bar that is along the right side of the writer. The cursor will appear in
the far-left top corner of the white writing area. You should start your letter
with the body of the letter because the Formletter
Writer will always fill in the heading, customer name and address, and date so
you don't want to duplicate. The program does not fill in the salutation and
writer's name at the bottom so you must enter these items. When you are
finished you should click on the "SAVE LETTER" gray bar. A
blue-bordered box will appear in the center of the screen. Enter the name of
the letter that you want to use to refer to this letter and then click on the "OK"
gray bar.
If you want to change an existing letter you can click on the "OPEN
LETTER" gray bar. A blue-bordered box will appear in the center of the
screen and a smaller white box will have a list of all of the letters that are
currently available. Click on the one that you want to change and click on the
"OK" gray bar. You can click on "CANCEL" if you don't want
any of the files shown. If you decide "OK" the letter will appear on
the screen. Edit by using the arrow keys, the delete and backspace keys until
you get the letter the way that you want it. Click on the "SAVE
LETTER" gray bar to finish your editing session. A blue-bordered box will
appear again in the center of the screen and the name of the file should
already be filled in. Click on the "OK" gray bar.
One box on the CUSTOMERS screen needs special mention. This is the box at the
bottom right of the screen labeled MONTHS NO INT. This is only for customers
that have a charge account and have been granted a waiver of interest for a
given number of months. Put between 1 and 99 in this box. Each month when the
interest is added to other accounts, no interest will be added to any account
that has a number in this box and the number in this box will be decremented by
one. When the number reaches zero, the account will again be charged interest
like any other account. If a charge is made close to the date that interest is
to be charged, or if you just don't want to charge interest on the first month
of a charge, place a 1 in this box. If you want interest the first month place
a 0.
THE ORDER SCREEN
If you want to enter an order to one of the suppliers that have been entered
into the computer, click on the "Orders" icon. The orders form will
appear on the screen.
You will notice that a list of the suppliers is in the large white list box
that is in the bottom right corner of the screen. Point to the supplier that
you want to order from and click. (Note: If the supplier is not on the list you
will need to enter that supplier by clicking on the "Supplier" icon.)
The supplier's name, address, and normal terms will be filled in the
appropriate boxes. The cursor will be blinking in the "description of
item(s) to be ordered" box.
If the order is for a customer you will want to enter the information for the
customer at this time. You can bring up a customer's information by entering
the phone number into the appropriate box. You can also bring up a customer by
entering the last name of the customer. A list of matching last names will
appear in the large white box at the bottom right of the screen. Click on the
last name of the customer that you want.
Fill in the other boxes that you want at this time.
"Order date" refers to the date that you are placing the order. It
will automatically be filled in with the current date but you can correct it to
any date that you want.
"Promised date" is the date that you want the ordered merchandise to
be in the store.
"In date" is the date that the ordered merchandise is in the store.
"To cust date" is the date that the
merchandise is given to the retail customer.
"Terms" are the terms that you expect the supplier to give you with
this order. It is filled in with the "Normal Terms" for the supplier
that you are ordering from but it may want to be adjusted for this particular
order.
"Cost" is the price that you expect the supplier to furnish the
ordered item to you.
"Cust. price" is the price that you expect to charge the
customer for the merchandise. This information does not get printed on the
order but is for in-store use only.
When the "description" box is filled in with one line of the order
you should click on the "end line" gray bar. That line of the order
will be moved to the large white box at the bottom right of the screen and the
"description" box will be emptied so you can enter another line.
When you have saved the last "description" box and you are ready to
print the order, point and click on the "END ORDER" box. The order
will be printed.
THE REPAIR SCREEN
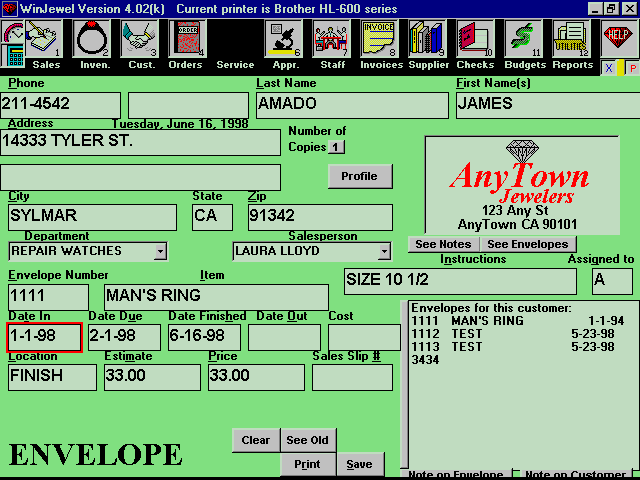
To enter a job envelope click on the "Envelope" icon. The envelope
form will appear on the screen.
You can bring up a customer as you have in the other forms by either entering
the phone number or by entering the last name and clicking on the name that you
want as it appears in the large white box.
If you enter a new customer, that customer will be added to the customer file
at this time so you can use the information again. If you
change any information on a customer that change will be made in the customer
master list when you save this envelope.
After you have brought up a customer the cursor will be blinking in the
"Envelope number box. If the customer that you brought up has envelopes
that have already been entered into the computer, a list of those envelopes
will be in the large white box. If you want to bring up any of those envelopes
you can point to the one you want and click.
You can also enter a new envelope into the system by entering the envelope
number into the appropriate box. If you enter a number that is already in the
computer the information for that envelope will be filled into the appropriate
boxes. This is the shortcut way to enter all information when you want to
update an envelopes information such as that it is finished being worked on.
You don't even have to go through the steps to enter the customer's
information.
When you are finished with any entries or changes you must click on the
"FINISHED" gray bar to save the entries that you have made. If you
leave the envelope program by clicking on any of the other icons along the top
of the screen, no information is saved.
Later when you are ready to write a sales slip for this envelope, enter E in
the location on the sales screen that you usually enter the first three digits
of the stock number and enter the envelope number in the second box of the
stock number. The name and all other information will be filled in on the sales
slip.
APPRAISAL
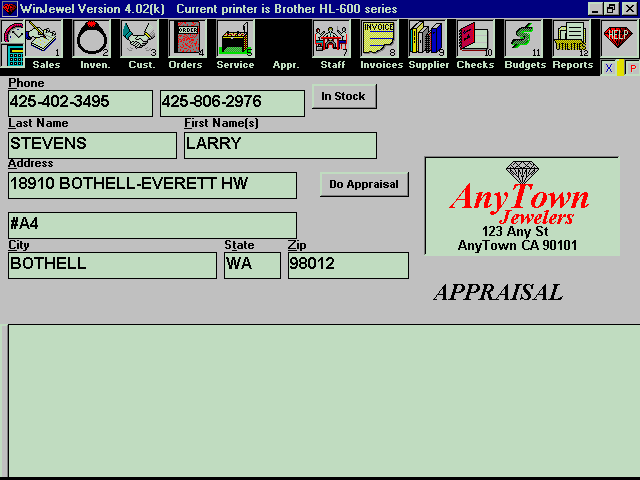
In order to do an appraisal you must start by going to the
"APPRAISAL" icon. Click and bring up the "APPRAISAL"
screen.
Next bring up the customers name by either the phone number or the last name.
After you have the customer that you want on the screen, click on the "Do
Appraisal" button.
The appraisal work sheet will appear on the screen. A list of the file names of
any appraisals for this customer that are on file will be on the screen. Each
file name has the date that the appraisal was last worked on next to it. If you want to work on one of these appraisals (for instance to
update it) just click on the file.
If you want to do a new appraisal, start by clicking on the type of item and go
on to describe the item by clicking or filling in the appropriate items.
If the item has a stone or stones, click on the "Add a Stone" button.
Describe the stone by clicking on appropriate items or filling in boxes. The
small "c" button is a calculator for putting in dimensions and
letting the program do the math to figure the weight of the stone. If you use
this feature be careful to alter the weight that is the answer because the
girdle thickness or other cutting abnormalities just as you would if you were
figuring the weight yourself.
When you are finished with a stone, click on the "End
Stone" button. If you want to add other stones to the description
click on "Add a Stone" again. If you are entering multiple stones at
one time (such as with side stones that are all similar) enter the total
weight, not the per-stone weight in the "carat" box.
If you want to show the clarity, color or cutting grade of the stone - point to
the slide bar for that quality item and while holding the left mouse button
down, slide the bar to the appropriate grade. If you don't move a slide bar for
any particular stone then no grade will be shown in the text for that stone.
Therefore if you want to show the highest grade for any stone you must move the
slide and then move it back to the far left.
When you have finished entering any and all stones for this item, click on the
"End Item" button.
If you want to add other items to the appraisal you can do it at this time by
just starting to describe the next item.
If you want to edit the "opening", "signature" or
"closing" that will be added to the text with each appraisal, click
on the "Edit Inserts" button. You can also set the left margin and
default text style and size by clicking on this button. Any changes that you
make to these items will remain as the default until you change them again.
If you are finished entering items for this appraisal, click on the "See
Text" button. The text of what you have described by clicking will show on
the screen. You can now edit the text in any way that you want. The price that
you want on each item should be entered at this time by pointing to the
"0.00" price, clicking, and then editing in the price that you want.
To edit or add any text, use the same technique. Notice that the
"painting" technique that is available throughout WinJewel and most
Windows programs can be used. The painting technique is used whenever you want
to replace text with something new that you enter from the keyboard. Point to
one side of the area of text that you want to replace then hold the left mouse
button down while you move across the text that you want to replace. The text
will turn dark. After you release the button, if you type anything it will
replace what was marked. If you want to insert text into your appraisal at any
spot, point to the spot that you want to insert something. Click once. Then as
you type you will insert text.
When you have the appraisal looking the way you want, click on the
"Print" button as many times as you want copies of the printed
appraisal. Click on the "Save" button to save the
appraisal on the hard disk.
If you want to copy the appraisal to your favorite word processor, click on
"Copy to W/P" button. Enter the correct command to load your favorite
word processor. This command will be the default the next time that you click
on the "Copy to W/P" button. After the word processor comes up,
"paste" the text that you have been working on by using the paste
command in the word processor. Example: If you were using "Write",
click on "Edit" then click on "Paste". The technique is
similar in all Windows style of word processors.
STAFF
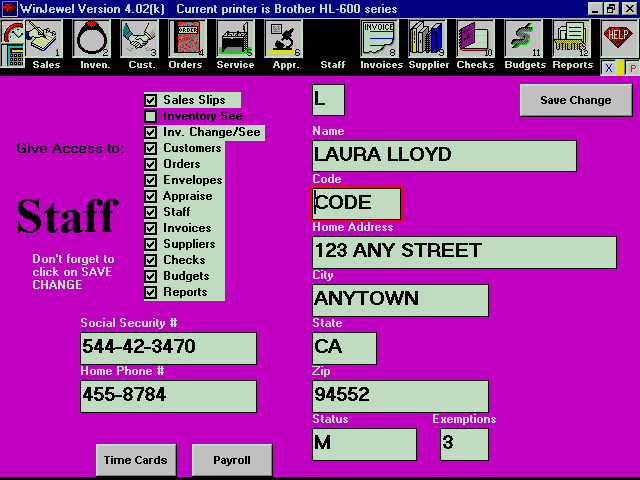
The STAFF icon will give you access to the security system for your computer
during the WinJewel program. Only the key person(s) in your store should be
given access to the "Staff" screen. You should not bring it up if
anyone is looking over your shoulder so that they can read the screen.
To start the "Staff" routine, click on the "Staff" icon.
The "staff" form will appear on the screen. The alphabet will appear
along the left side of the large white box. Any staff members that are entered
into the system will appear next to the letter that they have been assigned.
These letters are just a short-cut way for the computer to refer to any staff
member and allow less space to be taken up in the computer files. These letters
can be thought of like the keys on the older cash registers that were letters
and each key was assigned to a staff member. It is a good idea to try to use a
letter that refers to the staff member's name. This is not always possible.
To enter or change an entry in the system, point to the line of the list that
you want to change and click. Input boxes will appear near the top of the
screen into which you can enter the staff member's name and code. Also a list
of the icons that are normally along the top of the screen will appear. Click
on the programs that you want to give access to this staff member. Notice that
the name of that icon will turn white. This tells you that you have given
access to that function for the staff member that you are working on.
The name that you enter will be the name that shows on sales slips, daily
reports and other forms that are printed by the program.
The code that you enter for the staff member is the code that that staff member
will have to enter anytime that he or she wants to click on an icon to do
something in the program. Codes should be relatively short (no more than 5
characters) and should be changed anytime that you feel you or the staff member
wants. We suggest that you let the staff member choose his or her own code -
making it something that is easy for them to remember.
When you have entered all of the information for name, code and icons to give
access to then you should click on the "SAVE CHANGE" gray bar.
THE INVOICE SCREEN
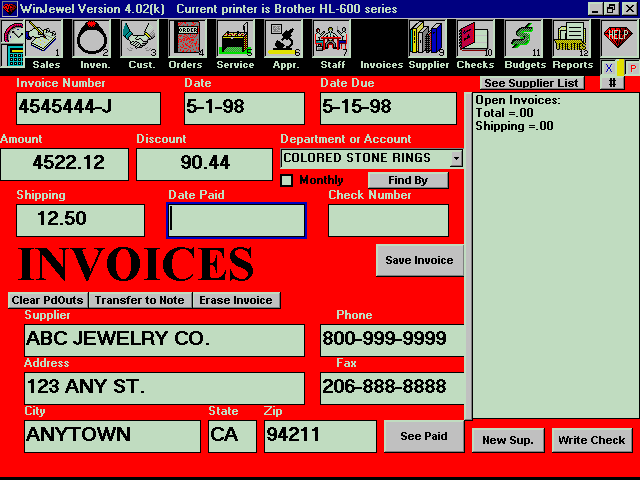
To enter or edit invoices, click on the "INVOICE" icon. The invoice
form will appear on the screen.
A list of the suppliers that have been entered into the computer will show in
the large white box on the right side of the screen. In order to enter any
invoice you must first have entered the supplier's information and assigned
that supplier a number. You do this through the "SUPPLIER" icon.
Click on the name of the supplier that you want to enter an invoice for. The
supplier information will be filled in at the bottom of the screen in the
appropriate boxes and the cursor will be positioned in the "invoice
number" box.
Enter the invoice number. Next enter the date of the invoice in the next box.
The following box should have the date that the invoice is expected to be paid.
Be sure that you take into consideration discounts that are available by this
date.
The next box is for the amount that is discountable. (Usually
not including shipping, etc.)
The next box is labeled "discount" and you should put in it the
amount in dollars that can be taken off of the "amount" box if this
invoice is paid by the "date due". If you find it easier you can
enter any percentage in this box (example: 2%) and the computer will convert it
to dollars. To use this automatic computation you must end this entry with a
percent sign.
If this invoice was prepaid, you would enter the check number in the next box
but usually the next box should be left empty and the checkbook program will
fill it in when the invoice is paid.
Don't forget to click on the "SAVE INVOICE" gray bar to save what you
have entered.
THE SUPPLIER SCREEN
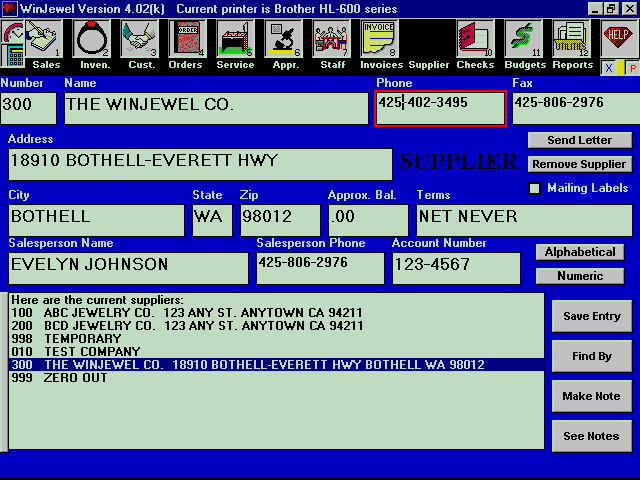
All of the suppliers that are used by your store should be entered here along
with the address, phone, and normal terms.
Remember that the numbers that you assign to each supplier should be in
increments of 5. (Example: 5, 10, 15, 20, 25, etc) Use the
even 100's for your major suppliers. (Example: 100,
200, 300, etc.) If you have memo merchandise from any supplier the
supplier number for that memo merchandise should be one number higher than the
number for normal merchandise from the same supplier. (Example: if 500 is the
supplier number - 501 would be memo merchandise from the same supplier.)
Be sure to click on SAVE ENTRY gray bar to save the information that you have
entered.
If you want to change an existing supplier's information, point to the name of
that supplier in the large white box and click.
If you want to remove a supplier, change the name of the supplier that you want
to remove to be ZERO OUT. That supplier will be removed with the next sort. Be
careful removing any supplier that you have inventory in the inventory file
for. You will not be able to access that inventory. Change the numbers of any
items to the supplier TEMP.
If you want the computer to find the next available supplier number, double
click on the "Supplier Number" box.
THE CHECK SCREEN
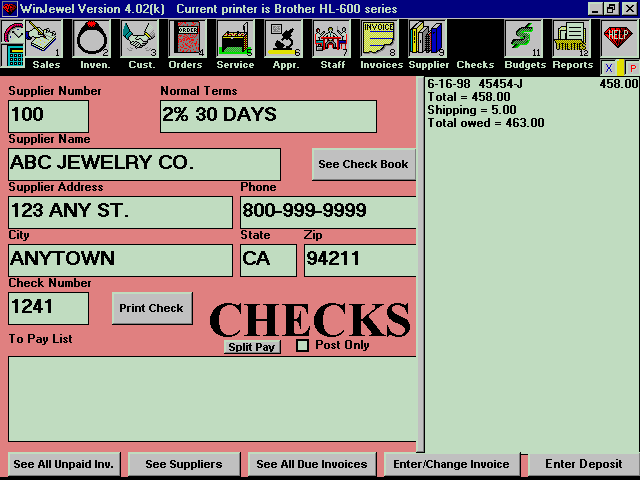
In order to write a check using the WinJewel system you should click on the
"Checks" icon. This will open the check writing form. Along the right
side of the screen you will see a list of all of the suppliers that are
currently in the computer.
Point to the supplier that you want to write the check to and click. This will
fill in the information on the form for that supplier. Also a list of the
invoices that are currently not paid will appear in the large white box on the
right of the screen. Point to and click on any invoice that you want to pay.
You will notice that it turns dark and the invoice appears over in the "to
pay" box on the left side of the screen. You can click on as many of the
invoices that you want. Each will be added to the list to pay.
If an invoice is not entered but you wish to pay it, you will have to click on
the "Invoices" icon at the top of the screen and enter this invoice.
Then click on the "Checks" icon again and start over choosing which
invoices to pay.
When you are satisfied with what you have chosen, click on the "print
check" gray bar. You will be asked to "Put a check form in the
printer". Click on the "OK" gray bar if you are ready. The check
will be printed.
To see the checkbook listing, click on the "See Checkbook" gray bar.
You can see or print the checkbook from this screen. To change any item, point
to the item and click. To mark a check as having cleared the bank click on the
column that is marked "ST" for status. A "*" symbol should
appear. To remove it, click again. It is important to remember that the
starting balance of the next month's checkbook is only brought forward when you
look at the checkbook. If you enter a check in an older month, but don't look
at the check book, the balance forward on the next month's check book will not
reflect the change until you look at the checkbook for the month that the check
was written.
THE BUDGET SCREEN
Clicking on the BUDGET icon can do budgeting for each department and each cost
account. Budgets must be completely re-entered if you change a department or
cost account so you should be careful to get these two lists entered correctly.
After you click on the BUDGET icon a blue-bordered box will ask you to enter
the year that you want to process. Enter the last two digits of the year.
(Example: 93) If this is the first time that the year given has been used, a
blue-bordered box will tell you that this is the first time. If you do want
that year then click on "OK".
A "spread sheet" will appear. Along the top will be the months from
January to December. Down the left side will be the merchandise departments
followed by the numbered cost accounts. The total of each column will be at the
bottom of each column and the total of each row will be at the right of each
row. A grand total for the year will be in the bottom-right corner. These
totals cannot be changed directly by you, but if you change any other amount in
the spreadsheet these totals will be automatically changed.
To change any one position in the budget, point to the square that you want to
change and click. It will be highlighted. Type what you want to be in that
position into the input box at the bottom left of the screen. When you click on
the "POST AMOUNT" gray bar, the amount will be transferred to the
correct position in the budget and all of the math will be updated on the
totals.
If you want the same amount for each month in any one row, click on the title
of that row. The whole row will be highlighted and when you enter an amount
into the box at the bottom left and click the "POST AMOUNT" gray box,
the whole line will be filled in.
Budgeting is vital to any well run business. Use thought in arriving at your
budget. It will give you goals and a direction to your business.
THE REPORTS SCREEN
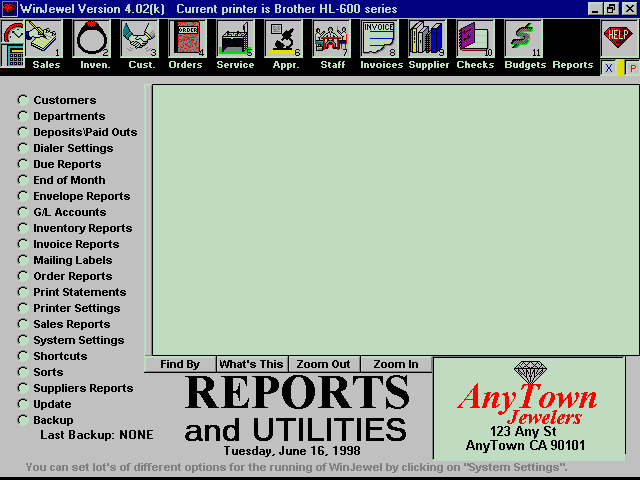
The Report icon could better be called "REPORTS AND UTILITIES". Each
of the listed reports can be run to analyze or list the information that you
have entered using the other ICONS. Also different Utilities that help sort or speedup
the running of the entire WinJewel set of programs are found on this screen. To
run any of the programs or to set any of the properties, just click the button
next to the title that you want to perform. A more detailed menu will now
appear in the center of the screen. Single click the name of
the exact procedure that you want to run.
![]() PRINTER SET
UP
PRINTER SET
UP
The WinJewel Program can be set to work with different types of printers.
Click on the "Reports" icon. Then click on the "Printer set
up" choice. A list of the possible settings and a list of the current
settings will appear in the large white box.
You can choose from three general types of printers:
Lazier Style Printer
Windows Compatible Printer
Text Only Type Printer
This does not replace a correct driver having been
entered for WINDOWS. It simply chooses the clearest style of output for the
three major types of printers. You can experiment with the three types using your
printer. You may like one better than the other.
You can also choose whether you want sales slips printed as you enter them.
Some stores like to enter on regular sales slips by hand and enter all of the
slips later into the computer.
![]() BACKING UP
YOUR DATA
BACKING UP
YOUR DATA
It is very important to back up your data on a regular
basis. You decide how often to do this but in making this decision be sure to
realize that if you have a failure of your system, you will have to enter
everything again that was entered after the last backup that you did.
There will always be a date following the "backup" choice on the
"REPORTS" screen. The WinJewel program uses a sophisticated
compression technique to copy the files that you need to a floppy disk. All you
have to do is to place a floppy disk into your drive and click on the
"backup" choice. The computer will ask you which drive (A or B) you
wish to use and then will ask you to verify that you want the disk that you put
in to be totally erased.
If you ever need to restore your data to the computer, the choices are on the
same screen. Be careful using the RESTORE option. Remember that you will lose
all work that has been done since the last backup.
![]() DAILY
REPORT
DAILY
REPORT
Each day you will want to do a printout of what has been written up using the
"sales" icon. Click on the "Sales" choice from the
"REPORTS" screen. Then you will see two choices appear in the large
white box. Double click on the "Daily Report" choice.
You will get a list of each sale. This will show who sold it, the stock number,
the description of the item, the department the item was in, the customer's
last name, and the amount of the sale.
You will also get totals for each department, salesperson, and type of sale.
If you have entered a deposit for that day, you will see that deposit and a
total of how much was deposited. This will help you to see that all is balanced
with what should have been deposited.
These daily reports should be filed away in a safe place.
![]() DEPOSIT
ENTRY
DEPOSIT
ENTRY
To enter a deposit click on the "deposit"
choice on the "Reports & Utilities" screen. You will be asked for
the date, name of the deposit and amount.
Usually several deposits must be made to account for a total day's cash
receipts. The "main" deposit is usually the cash and checks that have
been taken in that day. The "Visa", "MasterCard",
"American Express", "Discover" and "other"
deposits sometimes have to be done separately. Also, during large cash days,
you may wish to make an early deposit just to reduce the amount of cash in the
drawer.
The WinJewel program can handle any number of deposits for one day. Just put
the same date in for that deposit and it will show on that day's Daily Report.
Deposits can also be made from the "Checks" screen by clicking on the
"Deposit" gray button.
![]() MONTHLY
REPORTS
MONTHLY
REPORTS
To get a summation of a month's sales transactions,
you should click on the "Sales Report" choice on the
"REPORTS" screen. You will see two choices appear in the large white box
in the center of the screen: "Daily report" and "Monthly
report". Point to the one that you want and double
click.
The "Monthly Sales Report" will not give you a line-by-line listing
of all sales like the "Daily". You will receive totals by Salesperson,
Department, and Type of Sale.
![]() SORTING THE
FILES
SORTING THE
FILES
It is very important to the speed of the program that you sort the files every
once in a while. Any item can be found in the computer whether it is sorted or
not. It just speeds up the lookup process if the items are in order.
Click on the "Sort" choice on the "REPORTS AND UTILITIES"
screen. The computer will remind you that this could take a long time if you
have a lot of information stored in the computer. If you are using more than
one computer, be very careful that all other computers do not try to run the
WinJewel program during a sort. We suggest that you run this sort at night as
you leave the store. This way it will be done in the morning and you will not
have someone use another computer accidentally while you are sorting.
It is important to any computer that you DO NOT STOP THE COMPUTER WHILE A SORT
IS PROCESSING.
This is worth repeating. DO NOT STOP THE COMPUTER WHILE A SORT IS GOING ON.
As a matter of fact it is not a good idea to stop the computer anytime that
disk writing is happening. In WINDOWS it is best to leave WINDOWS completely
and wait for the "C:" prompt before turning off the power. This is
because WINDOWS does its own disk updating at almost anytime without you
knowing it is happening. Most professional computer people leave the computer
turned on all the time. The small amount of power that is used by the computer
is more than offset by the "shock" damage that happens to the
computer by heating and cooling when the power is turned on or off. The only
"gotcha" is that an image can be burned into the screen if the same
image stays on for too long. Use your WINDOWS screensaver to eliminate this
problem.
![]() APPRAISALS
APPRAISALS
In order to do an appraisal on an item that has been entered into the system
you must start by going to the "APPRAISAL" icon. Click and bring up
the "APPRAISAL" screen.
Next bring up the customers name by either the phone number or the last name.
Next click on the "In Stock" gray bar. You
will be asked first for the supplier number for the item that you want. This is
the first three numbers of the stock item.
Then you will be asked for the item number. This is the next five numbers of
the stock item.
You are then prompted for any further information that you want to add to the
bottom of the appraisal description.
That's all there is to it. It is nice to attach a Polaroid picture of the item
to the appraisal printout.
If the appraisal seems to be missing some of the data necessary for a complete
job, click on the "Inventory" icon and add the information that you
need for the appraisal.
![]() FINDING A
CUSTOMER
FINDING A
CUSTOMER
The two main ways to bring a customer's information to
the screen are: by typing the phone number into the phone number box or
entering the last name or part of the last name into the last name box. These
techniques should be familiar to any user. If you are not comfortable with
these procedures please practice with SALES SLIP, CUSTOMERS, ENVELOPES, or
ORDERS icons.
If you are entering in a new customer in any of these four forms, if the same
last name or phone number is already in the system, you will be shown these
matches. Try not to enter the same customer into the system twice. All
transactions are tied to the customer that is on the screen at the time of the
transaction. If a customer is entered twice, each transaction is only tied to
one of these entries. You might look up the other entry when you are trying to
find something.
There are two other ways to find a customer that are handy. Clicking on the
"Reports" icon and then clicking on the "Customers Reports"
choice arrives at both. You can then find a customer by their address (or
partial address). Also you can find a customer by a note (or partial note) that
has been made on that entry. Both of these searches work best if you don't try
to be too specific. For example: You would do better by searching for the
address "3065" rather than "3065 NW Any Street". If the address had been entered "3065 N.W. Any St"
no match would be found. If multiple matches are found, each match will be
listed for you to see. You can then decide which one you wanted. The same
searching technique works best for notes. Remember that the computer will
always look for an exact match.
![]() FORM
LETTERS
FORM
LETTERS
To send a form letter that is already in the system
you must click on the "Customers" icon. Next bring the customer's
information onto the screen by either the phone number or last name technique.
Now click on the "SEND LETTER" gray bar. A list of the form letters
that are now in the computer will appear in the larger white box. Click on the
name of the letter that you want to send to this customer. The letter will be
printed and a note to show that the letter was printed will be made on the
customer's notes.
If you want to make a new form letter or change a letter before sending it,
click on the "EDIT LETTER" gray bar. The screen will change and a
special formletter writer will appear on the screen.
Four gray bars along the right side of the screen are: "NEW LETTER".
"OPEN LETTER", "SAVE LETTER" and "EXIT WRITER".
"NEW LETTER" should be used when you want to add a new letter to the
list of letters that can be sent. After you click this gray bar you can type in
the letter that you want. Remember that the computer will fill in the heading
and address portions of the letter so don't put them in or they will be
doubled. When you are satisfied with the letter click on
"SAVE LETTER". You will be prompted for the name that you want
to use for this letter. It is limited to a maximum of 7 letters. It cannot have
as suffix.
"OPEN LETTER" should be used when you want to change an existing
letter. After you click on this gray bar you will see the normal WINDOWS style
of file information. Click on the name of the file that you want to change.
Then click on the "OK" gray bar. When you are finished changing the
letter, click on the "SAVE LETTER" gray bar. You will be given the
chance to change the name of the file before you save it. If you choose another
name, the old letter will still be on the list with the old name.
"EXIT WRITER" should be used when you want to go back to the
"CUSTOMERS" screen. You will be asked if you are sure that you want
to do this. If you answer yes, any changes or additions that you have not saved
will be lost.
If you place any of the following all capitalized words between < and >
in your letter, the information from the current customer will be substituted
for the word.
<LAST NAME> will replace with the last name
<FIRST NAME> will replace with the first name
<ADDRESS> will replace with the street address
<CITY> will replace with the city name
<STATE> will replace with the state 2 initials
<ZIP> will replace with the zip code
<BALANCE> will replace with the current balance
<AGREED PAYMENT> will replace with agreed payment
<CREDIT LIMIT> will replace with the credit limit
<PHONE> will replace with the first phone number
Please notice that these must be entered exactly as shown to be replaced. You
should include a space just before each and just after each word to be
replaced. You should not enter the quote marks. They are included here just to
make the "Less Than" and "Greater Than" symbols print.
![]() STATEMENTS
STATEMENTS
If you want to send statements to one or all of the
customers that owe money, click on the "Statements" choice on the
"Reports" screen.
You will be given two choices: to send statements to all of the accounts (that
means all of the accounts that have a balance due) or to send one statement to
just one account.
If you choose all of the accounts you will simply need to see that the printer
doesn't run out of paper. Everything is automatic. (Don't forget to post
interest before printing statements.)
If you want to send to just one customer, you can also go to the customer
screen, bring up one customer and click on the "Statement" gray bar.
![]() MAILING
LABELS
MAILING
LABELS
The labels routine can be found by clicking on the
"Reports" icon. You will see "Mailing Labels" as one of the
choices. When you click on this choice you will see several choices. The first
choice will allow you to print labels for all customers that have been entered.
The next choices will print labels based on different criteria. Double click on
the choice that you want.
You will be asked if you want to change the layout of the labels. If you click
on "Yes" then you will be shown a screen that will help you to set
the spacing of the labels to be right for the label forms that you are using.
First adjust the size of the font so that the vertical spacing is current for
your labels. This will take some experimentation. Don't try to set the horizontal
spacing until you get this satisfactory.
Horizontal spacing is adjusted by changing the "A" and "B"
tab settings. Again this will take some trial and error.
When you have the vertical and horizontal spacing the way that you want then
you can adjust how many rows (vertically) that you want to a page. When all is
the way that you want it, click on "save/exit". You are now ready to
print your labels.
![]() FORM
LETTERS
FORM
LETTERS
To send a form letter to a customer you should first
go to the CUSTOMERS screen. Then you must bring a customer's information onto
the screen be either the phone number or last name.
Now you can click on the FORM LETTER gray bar. A list of the letters that are
now in the file will appear in the large white box at the bottom of the screen.
Click on the name of the letter that you want to send to this customer.
The letter will be printed and a note will be made for this customer saying
that this letter was sent on this date.
![]() TAKING
INVENTORY
TAKING
INVENTORY
There are three easy ways to take inventory with the
WinJewel program.
One is to simply do a printout of all inventory by
going to the reports screen and clicking on INVENTORY REPORTS, then clicking on
FULL LIST OF ALL INVENTORY. Then you can simply check off each item as you find
it in your store. All inventory will be in number
order so it will be easy to find on the printout. Any unchecked items at the
end of the process will be missing. Any item not on the printout will need to
be added to the file.
A second very accurate way to reconcile your inventory is to select ALL from
the INVENTORY - CHOOSE TAGS TO PRINT option of the REPORTS screen, then
printing a new set of labels using a different color of tag. These tags will be
in number order so they are easy to find. Replace each tag as you find each
item with the new color. When you are finished, all tags in stock should be the
new color and any leftover tags are missing inventory.
The third way is to go to INVENTORY REPORTS on the REPORTS screen and choose
take inventory. This will automate the placing of a letter in the LAST
INVENTORY box of the INVENTORY screen. Enter the supplier and stock number
information and follow it with the price. If there is a match it will fill in
the letter that you have designated for this inventory taking session. Leave
the inventory taking routine by exiting the WinJewel program.
![]() ALIGNING
PRICE TAGS
ALIGNING
PRICE TAGS
Price tags must be aligned each time that you change the type of printer that you
are using or if you change the style of tags. This alignment only affects tags
that are printed on a general-purpose printer. (Not a dedicated tag printer)
To align for your particular printer and tags you should click on the REPORTS
icon then choose PRINTER SETTINGS. One of the choices that you will see is SET
THE SPACING ON PRICE TAGS. Click on this choice.
The screen that appears will allow you to change the alignment. First you
should always adjust the FONT SIZE until the vertical spacing for your
particular configuration is correct. You can use decimals for the font size up
to two places. (Example: 8.25) Keep experimenting with this number until you
get the vertical spacing exact. (Any previous horizontal spacing will be thrown
off by changing font size. This is why font must be exact before you try
setting the other settings.
Next you will set each of the horizontal positions for your tag sheet. These
numbers can only be whole numbers. (No decimal allowed) If you have the
settings to close together, sometimes some printer will wrap to the next line.
If this happens, increase the space between settings until the wrap stops
happening.
If you are unable to get the vertical spacing exactly right for your printer
you can turn on the micro-adjust feature by clicking on that button. The number
that you enter after clicking on micro-adjust will insert a very small amount
between each tag vertically. The amount that is added is consistent for each
printer but will vary from printer to printer. It depends on the dots-per-inch
that your printer supports.
![]() WRITING A
SALES SLIP CREDIT, DISCOUNT OR RETURN
WRITING A
SALES SLIP CREDIT, DISCOUNT OR RETURN
To write a return on a sales slip, enter everything that you would usually
enter on a sales slip except when you come to the price enter a minus sign just
before the amount. (Example: If you sold an item for 125.00, the return slip
would show -125.00 in the amount box.) It is important to keep the bookkeeping
straight that you choose the same type of sale that you did when you wrote the
original sale. (cash must be cash, charge must be
charge, etc) If it is a stock numbered item, the item will be shown as back in
stock in the inventory file.
There are two ways to show a discounted price. One is to change the price box
to the price sold before clicking on END LINE. The second is to leave the
pre-discounted price the same and click on END LINE, then enter a second line
with no stock number but with the description box reading something like LESS
DISCOUNT and the amount box with a minus sign before the amount for the amount
you want to take off. (See "Discount button")
A credit to a customer is written by making the amount box minus and clicking
on the CHARGE option for the type of sale. A refund to a customer is written by
making the amount box minus and clicking the CASH option for the type of sale.
![]() TO AUTOMATE
THE DISCOUNT PROCESS
TO AUTOMATE
THE DISCOUNT PROCESS
You can make a discount gray button appear on the
Sales Slip screen by going to the "reports and utilities" screen,
choosing "Sales Reports" and then clicking on "Make the discount
button visible on the sales screen".
Once this button is visible you can click on it when you are making a sale and
enter a percentage to discount the last item that you have written on any sales
slip.
For Example: If you had just clicked on "End Line Taxable" for an
item that was $100 and you wanted to discount that item 20%, you would click on
"Discount" then enter 20 when the computer asked you for the
percentage to discount. The line information will be filled in showing the
percentage discount and all you have to do is to click on the "End Line
Taxable" button to add this line to the slip. Of course if the line of the
item that was to be discounted had been a non-taxable item then you would click
on "End line no tax" to end this line.
![]() USING CITY
NAME SHORTCUTS
USING CITY
NAME SHORTCUTS
Whenever you are entering the city of a customer you
have the option of just entering a single letter. If you have defined this
letter to be a shortcut (You do this by choosing SHORTCUTS from the REPORTS
screen.) then the full city name, state and as much of the zip as you have
defined, will be automatically filled in the appropriate boxes.
If the city has more than one zip code, you will have to fill in the balance of
the zip code.
![]() DOING AN UPDATE OF THE WINJEWEL PROGRAM.
DOING AN UPDATE OF THE WINJEWEL PROGRAM.
At the present time and ever since WinJewel has been written, updates for
WinJewel are free. We can't promise that we will always be able to have updates
free.
You can update from our website by going to www.winjewel.com and choosing the
"update" option. Pay particular attention to the version numbers that
you have and the version number that you are currently running.
You must update each update that is on the website starting from your current
version. After you follow the direction to update each version, it is important
that you run a "Sort Everything" on the "Reports" screen.
This will convert the WinJewel files to the new format.
Then you can update to the next version.
Do NOT use the program after any update until you run
the "Sort Everything". If you do you are liable to corrupt the files.
Please feel free to give suggestions for further updates. We have provided a
form on our web page for this purpose.
![]() FINDING AN
INVENTORY ITEM
FINDING AN
INVENTORY ITEM
When you have the Inventory Screen showing, you will
see a GRAY BAR at the bottom left corner that is labeled FIND BY. This button
will allow you to find any inventory item by searching any field.
To use this feature you should click the FIND BY gray bar. Then enter any one
or more fields with the information that you want the list to have in common.
Then click the FIND BY gray bar again. A list of all items in inventory that
match will appear in the large white box.
If you want to see or change any one item, just click on that item in the list.
If you want to print a complete listing of all of the items
in the list, point and click on the first line in the box.
![]() WRITTING
AND BOOKKEEPING LAYAWAYS
WRITTING
AND BOOKKEEPING LAYAWAYS
There are two widely used methods of accounting layaways:
(1) If you put through the sale at the time the sale
is made, You will click on the LAYAWAY choice after entering the sale just as
you would any other sale. This will show up on the customer's account as a
layaway and payments will be deducted from the balance as they are made. If you
want to choose this method you can set WinJewel to use this method by going to
the Reports Screen and choosing System Settings. Then choose "Set Layaways
to be handled in the No-Sales tax-state way.
(2) If you put through the sale at the time that the item is picked up, you
will not have to customize WinJewel because this is the default way. It saves
state sales tax from being paid until the customer picks up the item. Also
credit for the sale is not given to the salesperson until the sale is picked
up. When you are writing a sale you will write it like any other sale but you
will choose Layaway as the type of sale. Then you will be presented with two
choices: Start Layaway and Pickup Layaway. You will click on Start Layaway
since this is being put onto layaway at this time. You can then end the line as
you would any other line. You can then click on Payment to record the
customer's amount that they are paying down. You should choose Layaway Payment
for the type of payment.
As the customer comes in and makes payments on the item you will enter only
Payments and choose Layaway Payment as the type of payment.
When the customer picks up the item(s) you will click on Layaway as the type of
transaction again and choose Pickup Layaway as the type from the list that
appears. A list of all items that are on layaway for this customer will appear
at the top of the screen. Point and click with the mouse on the item(s) that
the customer is picking up at this time. The item will be filled in on the
sales screen but you must click on End Line Tax or End Line N-Tax as is
appropriate.
Notice that the balance due is in small letters just under the customer's name.
This will be the balance if the customer only has one transaction going with
you at this time. Click on Payment and choose Layaway Payment. Fill in the
amount that the customer is paying at this time. This should be the whole
amount. Then click on End Line No Tax. (Payments you will remember,
never have a tax)
You can now click on End Slip. Choose how the customer is paying, enter the
amount and then click on Click Here to End.
Bookkeeping notes: A layaway item shows as a balance on the customers account
but it does not show as a sale on the stores books until the pickup. This is to
save having to pay the sales tax on the transaction until it is a done deal.
Inventory items are still counted as in stock until it is picked up. If you go
to the inventory screen the item will show the date put on Layaway in the Date
Sold box and the sales slip number in the Sales Slip box. There will be a ~
symbol just in front of the customers name in the Customer or Location box.
This ~ symbol is how WinJewel keeps track of items that are on Layaway. Doing a
![]() MAKING A
NOTE ON AN INVENTORY ITEM
MAKING A
NOTE ON AN INVENTORY ITEM
If you want to make notes about an individual inventory item (that there is not
a logical place to put the note or the space to put the note in one of the
regular boxes) click on the gray bar that says MAKE NOTE when you have the
inventory item on the screen.
It is important to remember that any note that you make will be there whenever
you click on the SEE NOTES gray bar if you have this item on the screen BUT you
will not be able to access this item based on the note. Finding an item must be
done by way of the individual boxes.
![]() MAKING A
NOTE ON A SUPPLIER
MAKING A
NOTE ON A SUPPLIER
If you want to make notes about a supplier (that there
is not a logical place to put the note or the space to put the note in one of
the regular boxes) click on the gray bar that says MAKE NOTE when you have the
supplier on the screen.
This is a great place to keep information such as salesperson or contact at the
company. Any information will be available to you anytime that you have the
same supplier on the screen and you click the SEE NOTES gray bar. The notes
will be dated and the newest note will be at the top of the list. If the list
is longer that can be shown at one time in the large white box, a scroll bar
will appear on the right side of the box. You can scroll to see older notes.
![]() COMBINING
INVENTORY ITEMS
COMBINING
INVENTORY ITEMS
If you are mounting a stone into a ring or putting any
two inventory items together, go to the inventory screen and click on the
COMBINE gray bar. You will first enter the item that will remain a valid
inventory number. (The item to survive) Then click on SAVE ITEM gray bar. Then
enter the item to be merged with the first item and click SAVE ITEM again. The
merged item will now show on the screen with the cost, retail and center stone
information merged. You can now make any further changes in the item if you
want but you must click on SAVE ITEM whether you make any further changes or
not.
The second item will show a sales slip number of 99999, a date of sold of the
date that the pieces were combined, and the number of the item it was merged
with in the CUSTOMER NAME box.
![]() NON-MOUSE
USE OF WINJEWEL
NON-MOUSE
USE OF WINJEWEL
It is possible to simulate many of the mouse movements from the keyboard if you
wish.
The icons can be activated by using the F-keys. F1 is the same as clicking on
the SALES icon. F2 is the same as clicking on the INVENTORY icon. Each of the
other icons responds to the F-key that is the same position on the keyboard.
You can move from each white INPUT BOX to the next INPUT BOX by pressing the
TAB key. Holding the SHIFT key down and pressing the TAB key will move back one
selection.
If a GREY BAR is highlighted, you can simulate clicking on that bar by pressing
the ENTER KEY.
On most screens the SAVE function can be clicked on by pressing the END key. In
the SALES screen END will simulate a click on END NO TAX, HOME will simulate a
click on END TAX, and a shifted END will simulate a click on END SLIP.
![]() USING THE
CUSTOMER PROFILE OPTION
USING THE
CUSTOMER PROFILE OPTION
If you want to analyze your customer base you must
capture the information each time that you enter a new customer. Start from the
customer icon and enter or bring up the customer that you want to enter the
profile information. Click on the PROFILE gray bar. This will bring up the
PROFILE screen. Click on one answer in each of the categories: AGE, HOME,
PROFESSION, SEX, MARITAL STATUS, NATIONALITY and WHERE HEARD. Then click on
SAVE.
If you want to change any of the labels you can do it from the CUSTOMER REPORTS
choice on the REPORTS screen. After you click on CUSTOMER REPORTS choose the
CHOOSE LABELS FOR CUSTOMER PROFILE option. Remember that changing any of these
labels does nothing to the information already in the file but to re-label it.
So any changes should be made before you start entering data.
To get a printout of your customer base profile, choose the ANALYZE PROFILE
option from the CUSTOMER REPORTS choice of the REPORTS screen.
If you want to keep track of the preferences and special dates for each
customer click on the DETAILED PROFILE gray bar on the Profile screen. You will
then be able to record ANNIVERSARY, BIRTHDAY, FAVORITE STONE, RING SIZE, WORK
PHONE, PARTNER"S NAME and the same information about the partner. When you
have entered all that you want, click on the END/SAVE gray bar.
Later if you want to get a list of all customers that have a special date,
favorite stone or any other item on the DETAILED PROFILE screen, you can go to
the REPORTS screen, click on CUSTOMERS REPORTS and choose CUSTOMERS BY PROFILE
INFORMATION. Fill in one or more of the blanks and click on the PRINT LIST gray
bar. You will get a list of all customers that match what you entered.
![]() RECEIVING
FILES VIA MODEM
RECEIVING
FILES VIA MODEM
To receive an update of the WinJewel program or any
other file immediately, if you have a modem in your computer, you can click on
the REPORTS and UTILITIES icon and choose UPDATE from the list. One of the
choices you will be given is to update via modem. This can be used to get any
file from the folks at WinJewel.
To transfer files we need to have the same settings on your computer that we
have at WinJewel:
Click on SETTINGS
Click on BINARY TRANSFERS
Click on XMODEM/CRC
Click on OK
Click on SETTINGS
Click on COMMUNICATIONS
Click on COM1 (or whichever your modem is attached to)
Click on 2400 BAUD RATE
Click on 8 DATA BITS
Click on 1 STOP BIT
Click on PARITY NONE
Click on FLOW CONTROL Xon Xoff
Choose PARITY CHECK
Choose CARRIER DETECT
Click on OK
Click on TRANSFERS
Click on RECEIVE BINARY FILES
When computer asks for file name enter : WJUP.DAT
![]() CHANGING
SALES SLIPS
CHANGING
SALES SLIPS
It is really better to write a new slip that
compensates for the slip that you want to change. Changing any slip does not
change the balance on an account. It does change the totals on any day or month
report if you run that report again. Be very careful making any change because
very few of the safeguards that are normally built into the WinJewel system of
checks and balances will be working.
If you do find it necessary to change a slip, go to the REPORTS screen, choose
SALES REPORTS and click on SEE OR CHANGE ONE DAY. Enter the day of the slip
that you want to change. Point and click on the line of that day that you want
to change.
Each separate part of the sales slip will show in a window box and allow you to
change it. Any part that you want to leave with no change, just press enter
without typing anything. After you have changed all parts of the slip, you will
be given one last chance to not change the slip. Enter YES if you want to make
the change permanent.
![]() PUNCHING IN
AND OUT USING THE TIMECARD FEATURE
PUNCHING IN
AND OUT USING THE TIMECARD FEATURE
Any staff member who is working on an hourly basis can punch in and out by
clicking on the small letter T that is in the upper left corner of the screen.
When they do the timecard screen will appear in the center of the viewing area
no matter what else is being done by the WinJewel program at the time. No other
files are affected.
A list of the current employees that have been entered using the STAFF icon
will appear in alphabetical order in the larger white box that is part of the
timecard screen. Use the scroll bar to see more of the list if any name is not
visible. Point to the name of the staff member that wants to
check in or out.
Then click on the IN or the OUT gray bar. If the last check
was an IN then only the OUT gray bar will show. If the last check was an
OUT then only the IN gray bar will show.
If no check IN or OUT is done in 30 seconds the timecard screen will time-out
and disappear. To bring it up again, just click on the small T again.
![]() POSTING INTEREST
TO ACCOUNTS
POSTING INTEREST
TO ACCOUNTS
Once a month you should post interest to all charge accounts that deserve it by
going to the REPORTS & UTILITIES screen and choosing PRINT STATEMENTS
group. One of the choices that are in that group is POST INTEREST.
When the POST INTEREST screen comes up it will show the last settings that were
used for posting. It will also show the current date in the date input box and
will tell you what was the last date that the POST INTEREST
routine was run.
Set the interest to what you want your system to charge each customer and the
minimum amount that you want any account charged in the appropriate places,
then click on the POST INTEREST gray bar. A thermometer will show what
percentage of the job has been done. Do not interrupt this routine for any
reason.
Any account that shows a zero in the MONTHS NO INTEREST input box when you view
it in the CUSTOMERS screen would receive an interest charge. If a number other
than 99 is in then MONTHS NO INTEREST it will be decremented by one number. (Example:
if there is a 3 in the box it will become a 2.) A printout showing all interest
charged to each account will be printed.
![]() REMOVING
INTEREST CHARGES FROM AN ACCOUNT
REMOVING
INTEREST CHARGES FROM AN ACCOUNT
If you want to remove the interest charged to any one
account, click on the thin gray bar at the bottom of the POST INTEREST screen.
(In the REPORTS & UTILITIES screen click on PRINT STATEMENTS then choose
POST INTEREST.)
You will be asked for the phone number of the account that you want to remove
interest. If the account does not have a phone number you will have to assign
it a fake number temporarily such as 999-9999 so you can remove interest. (Then
change it back to no number later.)
You will be shown each interest posting for this account one by one and asked
(YES or NO) if you want to remove this interest posting. At the end of the
account you will be shown a total of the number of interest postings that were
removed.
![]() MAKING
NOTES AUTOMATICALLY ON STATEMENTS
MAKING
NOTES AUTOMATICALLY ON STATEMENTS
There are two ways that the WinJewel program will make notes on each statement.
One is to make the same note on each statement. This note can be set by going
to the REPORTS & UTILITIES screen, choosing Printer Settings and then
choosing NOTE TO BE MADE ON EACH STATEMENT. Type in the one
line that you want to appear on each statement that is printed. You can
change this message each time that you want to send statements to reflect
something that is current for the month. If you want to not have a note on each
statement, choose SET UNIVERSAL MESSAGE NOT TO APPEAR ON EACH STATEMENT from
the same list.
A note is also made on each statement based on the MONTHS BEHIND number that is
stored with each account. (You can see this number on the CUSTOMER screen.)
These notes are set by going to REPORTS & UTILITIES screen, choosing PRINT
STATEMENTS, and choosing POST INTEREST. When the POST INTEREST screen comes up
you will see a gray bar marked SET NOTES. Each note that is currently in the
system will appear. These correspond to the 1 thru 9 that appear with each
account. (If a customer has more than 9 they will get the 9 note. If a customer
has less than 1 they will get the 1 note.) Point and click to the line that you
want to change and enter what you want to appear on those statements that have
that number.
![]() MARKING AN
ACCOUNT SO THAT IT DOESN'T GET STATEMENTS
MARKING AN
ACCOUNT SO THAT IT DOESN'T GET STATEMENTS
If you want an account to not get statements you must put an asterisk (*) just
before the street address line.
That way, when you run the statement routine to send all other accounts statements, any account with an asterisk at the left of the
address line will get skipped.
![]() CLOSING PAY
PERIODS AND CORRECTING TIME CARDS
CLOSING PAY
PERIODS AND CORRECTING TIME CARDS
At the end of each pay period, after the last employee
has checked out, someone who has a password that will let them into the STAFF
screen should go to that screen and click on the TIMECARDS gray bar. You will
get 4 choices. The first choice will close the time period and move all
timecards to an archive file.
Before you do this you should do a printout of all timecards by clicking on SEE
ONE EMPLOYEE'S TIMECARD, choosing each employee and clicking on PRINT TIMECARD.
The third and fourth choices you get are for changing a timecard. You can
change a time card for the current pay period with line three or change a
timecard from any previous pay period from line four. Previous time periods
have been assigned numbered names by the computer. Following that name will be
the starting date of each pay period. Click on the pay period that you want to
work on.
The most common problem with timecards is an employee forgetting to check in or
out when they should. To correct this, check the employee in or out now as
usual then correct the date and/or time on that entry.
![]() MARKING AN
ACCOUNT TO NOT SHOW UP IN MAILING LABELS
MARKING AN
ACCOUNT TO NOT SHOW UP IN MAILING LABELS
If you want any customer who is entered into the system to never show up when
you ask for labels to be printed or for postcards or broachers to be printed,
put the AT sign (@) in the far left position of the address line of that
customer.
If the no statements symbol (*) is already there, use the
second position in the address line. (The asterisk must always be in the
first position to stop statements. It can never be in the second position)
![]() TRYING
SAMPLE ENTRY OF THINGS AND THEN WIPING THOSE ENTRIES
TRYING
SAMPLE ENTRY OF THINGS AND THEN WIPING THOSE ENTRIES
When you first get the WinJewel program you will want
to experiment with entering sales, customers, inventory and lots of other
things. This is the best way to learn. Feel free to enter anything that you
want, then when you are ready to enter real data you
can eliminate your experimental entries.
The method to do this is a little unusual because we don't want someone to do
it accidentally later when we have real data in the computer.
First click on the SALES icon to bring up the sales screen. Then enter the word
ZEROFILES into the phone input box. Then press the enter key. You will then get
the choice of zeroing all files or any one group of files. Point and click on
your choice. Be very careful.
After you have run the system until you feel comfortable that you won't want to
ever zero any files again, go to the same menu and choose NO MORE ZEROING. This
will lock this option from ever being available on your system again.
![]() PASSWORD
PROTECTION and the WinJewel security system
PASSWORD
PROTECTION and the WinJewel security system
Each employee is given a password when you enter each
employee into the system by using the STAFF icon. While you are on this screen
you will see a line at the bottom of the list of employees that says CHANGE
WHICH PROGRAMS NEED CODE.
If you click on this line the list of each icon by name will appear along the
left size of the screen with a square box just to the left of each name. If you
click on this box an X will appear in that box and the name will change color.
This will mark that icon to require code before letting any employee into that
function. Don't forget to click on SAVE.
When you have any one customer up on the screen, you can choose which icons to
allow that employee to have access. Remember that if you didn't choose to have
a password required for any icon, all users of the computer can access that
screen no matter what you choose for them individually.
The INVENTORY icon has two choices: SEE or CHANGE/SEE. Sometimes you may want
an employee to look at or find any inventory item but not want them to have
access to changing or seeing cost of any item. If this is the case click on
SEE.
![]() REPRINTING
A SALESLIP
REPRINTING
A SALESLIP
Sometimes the printer will jam or for some reason you
want another copy of a saleslip. On the Sales screen,
bring up the customer that the slip was written for. Then click on the PREVIOUS
gray bar. All of the slips that have ever been written using the computer will
show in the large white box at the bottom of the screen. If the list is longer
than will fit in the box, a gray scroll bar will appear on the right of the
box. You can use the bar to scroll the list until you find the slip that you
want. Point with the mouse and click on that slip. You will be asked if you
want to reprint this slip. If you click on YES the slip will be reprinted.
![]() DELETING
CUSTOMERS FROM THE FILE
DELETING
CUSTOMERS FROM THE FILE
A customer can be deleted from the file by going to
the CUSTOMER screen and bringing up the customer (either by phone or by last
name). Add "999" to the end of the last name. Click on SAVE. This
will eliminate the customer from the file the next time that you run a sort.
It is not a good idea to delete customers. This will stop you from ever looking
up the information about this customer (notes, sales and repairs) It is better
to make a note on the account as to why they shouldn't be used and change the
address to something like: "DO NOT USE THIS CUSTOMER", or
"DUPLICATE USE OTHER NAME", or some other notice.
![]() DELETING
INVENTORY
DELETING
INVENTORY
Inventory items can be deleted by changing the supplier number to 999. The item
will be eliminated with the next sort.
Go to the INVENTORY screen then bring up the item that you want to delete.
Entering the supplier number and then the stock number in the labeled boxes
does this. Then click on the supplier number to give it the focus. Then change
it to 999. Don't forget to SAVE the item.
The item will still be in the file until you run the SORT EVERYTHING on the
REPORTS & UTILITIES screen.
![]() PRINTING
THE HELP FILE
PRINTING
THE HELP FILE
If you want to print just one screen of the HELP
system, bring up the screen that you want to print by choosing HOW DO I? from the HELP screen, then click on the question that you
want. Click on the gray bar that says PRINT SCREEN.
If you want a printout of the entire HELP file, click on the PRINT ALL gray
bar. This takes quite a while and a lot of paper but it will give you a manual
for the entire WinJewel program.
![]() CASH FLOW
ANALYSIS
CASH FLOW
ANALYSIS
The first white box that you will see has the assumed information about the
cash flow. How much per day do we think that we will take in? What is the
starting balance of cash that we have? To change either of these assumptions,
click on the line that has the information that you want to change. Then enter
the new assumption.
Clicking on the line REGULAR PAYMENTS can enter regular payments that are not
usually put into the invoice file until they are about to be paid. The regular
payment list will appear. Click on NEW ENTRY to enter a new item. Click on an
existing item to change that item. To eliminate one item, click on the item
then click on CANCEL. Examples of items that might be on this list would be
RENT, PAYROLL, UTILITIES or LEASE PAYMENTS.
When you are ready to see the projection, click on COMPUTE CASH FLOW. You will
be asked it you want a printed itemized list of all items to be paid out. You
will then enter the number of days into the future that you want to project.
You will then be shown a graph of future cash flow. If you want a printed copy
of the graph, click on PRINT COPY.
Try different assumptions to see how it will affect the cash flow. You can also
go back to the invoice screen and adjust the due date on individual invoices. Even if it means losing discounts. Sometimes you may even
need to call suppliers and tell them that you need to be a little late. Calling
ahead of time will often get an OK from your supplier and they will respect you
if you meet your projection.
![]() ADDING A
CASH DRAWER TO THE WINJEWEL PROGRAM
ADDING A
CASH DRAWER TO THE WINJEWEL PROGRAM
Many companies manufacture a cash drawer to work with
a computer. If you want to use a cash drawer with the WinJewel program you can.
To make WinJewel know that you are using a cash drawer you must create a file
in the WINJEWEL directory called "TILL.BAT". Place the command or
list of commands that will open the drawer in the file. If you ever want to
discontinue the use of the drawer you must erase the file from the directory or
WinJewel will go craze trying to open a non-existent drawer.
Each manufacturer has a different way of accessing the drawer. Read the
instructions that come with your drawer. If you are having trouble, give us a
call at WinJewel and we will try to help. We have had experience with many of
the drawers on the market.
If you have placed the "TILL.BAT" file in the WINJEWEL directory, the
program will place a small yellow button under the exit icon. (Next to the red one for the printer.) This button will open
your drawer when you click on it.
![]() SETTING THE
WINDOWS PRINTER DRIVER
SETTING THE
WINDOWS PRINTER DRIVER
The driver program for your printer should be supplied
by the manufacturer of your particular printer. If it isn't then many times a
driver that will work can be substituted from the Windows installation disks.
There are two ways to set which driver you want the Windows program to use from
within the WinJewel program. Click on the REPORTS icon and choose printer
settings. Click on CHOOSE WHICH WINDOWS PRINTER DRIVER TO USE.
Or a shortcut is to click on the small red button just under the EXIT icon and
a window will open to change the printer driver. Use the scroll bar next to the
printer name to see the name of the driver that you want to use. Point and
click on that driver.
If you want to change the style of output from WinJewel, you will have to go to
the reports screen and choose PRINTER SETTINGS and then choose LAZER, WINDOWS
COMPATIBLE or NON-WINDOWS COMPATIBLE.
If you need help setting up your printer call
WinJewel.
![]() CHANGING
THE SIZE OF PRINTED LOGO
CHANGING
THE SIZE OF PRINTED LOGO
because different companies write each printer driver, there is a big difference
in how large a graphic image is printed from printer to printer. To adjust for
these differences we have a choice on the REPORTS & UTILITIES screen that
will allow you to change the size to look right on your printer.
When you click on PRINTER SETTINGS and then choose CHANGE SIZE OF LOGO, you can
change the relative size by changing a number. 1 is the default size. Any
number smaller than 1 (but larger than 0) will make the image smaller. Any number larger than 1 will make the image larger.
Example: .85 would be smaller
1.25 would be larger
You will have to play with the numbers and print
samples to find the correct size for your printer and driver. Once it is set it
will remain the same until you change it again.
![]() SETTING THE
SALES TAX RATE FOR YOUR AREA
SETTING THE
SALES TAX RATE FOR YOUR AREA
You can set the tax rate by going to the REPORTS
screen and clicking on the SET TAX RATE choice.
Tax rate can be set to four decimal places.
If you have no tax in your state, enter 0.
![]() TURNING ON
OR OFF THE AUTOMATIC BILL REMINDER
TURNING ON
OR OFF THE AUTOMATIC BILL REMINDER
If you would like to have the computer remind you if there are invoices due in
the invoice file that are not paid yet, go to the reports screen and click on
the INVOICE REPORTS choice. Then choose the TURN AUTOMATIC BILL REMINDER ON/OFF
choice. Click on YES.
Each time that you start the WinJewel program you will be
shown all of the invoices that are due. You can then decide if you want
to pay them. If you do, go to the CHECK BOOK screen and write checks for the
due bills.
If you want to turn the BILL REMINDER off, go back to the REPORTS screen and
choose INVOICE REPORTS again. Then choose the TURN AUTOMATIC BILL REMINDER
ON/OFF choice again. This time click on NO.
![]() TO MAKE THE
PROGRAM GO FASTER
TO MAKE THE
PROGRAM GO FASTER
Any or all of these will make the WinJewel program run
faster:
1 - Add more memory to your computer.
2 - Move up the ladder of processors. (286, 386, 486 to Pentium)
3 - Add a "Windows Accelerator Card" to your computer.
4 - Change to a faster megahertz CPU.
5 - Run sorts of the files more often. (WinJewel can find things very quickly
even in large lists if they are sorted because it uses a very sophisticated
binary search technique.)
6 - Run DEFRAG and SCANDISK more often. (These must be done after closing both
WinJewel and Windows)
7 - If the printer seems to be slowing you down, add more memory to the printer
or add a separate dedicated print buffer with memory.
8 - Install a faster hard disk drive.
9 - Install a large enough hard disk to not have to use DOUBLESPACE
or any other disk compression program.
![]() ADJUSTING
TIMECARDS FOR BREAK TIMES
ADJUSTING
TIMECARDS FOR BREAK TIMES
Some stores want to pay employees for the time that
they are on breaks. If you want your store to not deduct time when an employee
is out on a break, go to the STAFF screen and click on the TIME CARDS gray bar.
The fifth choice down will be SET MAXIMUM TIME TO BE CONSIDERED A BREAK. Click
on this line.
If you answer 0 to this question, breaks will be deducted. (This is the
default) If you put any number larger than 0 then any check-in that is less
than that number of minutes (or exactly equal to) will not be deducted and a
note will be printed on the printed timecard to remind you.
If you change this setting it will affect all current timecards even if the
break was taken before the change.
![]() PRINTING A
COPY OF THE SCREEN AT ANY TIME
PRINTING A
COPY OF THE SCREEN AT ANY TIME
At most screens in the WinJewel program if you want to print a picture of that
screen you can push the CONTROL (usually labeled Ctrl) key and then the PRINT
SCREEN (usually labeled PrtSc) key on your keyboard.
This will not work if you have the PRINTER SETTINGS choice from the REPORTS
screen selected as a NON-GRAPHICS STYLE printer because these older printers will
not print graphic images.
Be careful. Remember that even though you printed a screen you still may not
have saved the information to the disk. You must still click on the SAVE gray
bar to cause the computer to save the current information on the screen.
The print screen function should be used for demonstration purposes. Don't get
in the habit of using it in place of the normal print functions of the program.
You can also use the key sequence CTRL then SHIFT if your keyboard does not
have a PRT SC key.
![]() SETTING AND
REPORTING MULTI-UNIT ITEMS THAT ARE DUE TO REORDER
SETTING AND
REPORTING MULTI-UNIT ITEMS THAT ARE DUE TO REORDER
If you want to reorder inventory items that are at or below a certain quantity
in stock then enter the number that you want to have as a minimum of the item
in the box marked MINIMUM REORDER if you make an item a multi-unit item by
checking that box.
Then on the REPORTS screen choose INVENTORY and then choose MULTIUNIT REORDER You will get a list of all items that are marked MULTI-UNIT
ITEM and have reached or are below the minimum reorder number.
![]() UNLOCKING A
FILE IN THE MULTI-USER MODE
UNLOCKING A
FILE IN THE MULTI-USER MODE
If you are running WinJewel on a network, If you leave the program in an
unexpected way (Such as by turning off the computer or thru a power failure or
a system error) you can leave the file(s) that you are working on locked so
that you will get a notice that the record is locked if you are trying to
access a file.
This is the natural notice to get if someone is accessing the same file or
record on one of the other computers on your network, but if you are sure that
no one else is using the system, or has left the computer with a file open on the
screen, you can unlock all files in the following way:
Click on the SALES icon and in the PHONE box type the word "unlock".
Be very careful not to do this if other computers are running the WinJewel
program on your network. Always take all other computers clear out of the
WinJewel program before unlocking.
![]() CHANGING
AND ADDING DEPARTMENTS
CHANGING
AND ADDING DEPARTMENTS
To change or add a department to your stores copy of
the WinJewel program you should click on the REPORTS icon and then click on the
DEPARTMENTS choice. You will then see a list of the departments as they are now
in your system.
Point to any department that you want to change and click. You will first be
asked for the name of the department. Remember that the first three letters of
the department must be different from the first three letters of any other
department because that is all that the computer will store. Sometimes this
takes a little creative naming of the departments to eliminate duplication.
At the end of the list will be some entries that say [NOT ASSIGNED]. If you
want to add another department after you have changed the existing department
names, click on one of these entries. If you want to eliminate one of the
departments, change it to read [NOT ASSIGNED]. Be sure to use the square
brackets around the words.
After the name you will be asked for the percentage that will be the default
used by the program if no cost is given for any inventory item if it is sold.
This allows the program to figure gross profit more accurately. Enter the
average cost percentage for the department.
After the cost percentage you will be asked for the OPEN TO BUY for the
department. The OPEN TO BUY method has been used for years by the department
stores and large jewelry chain stores.
If you want a department to remain at about the same inventory level that you
now have enter 0. If you want a department to increase in
inventory enter a plus number for the OPEN TO BUY. If you want the
department to decrease, enter a minus number.
Each time that you enter an order for a department, the cost will be deducted
from the OPEN TO BUY for that department. Each time that you sell something,
the cost will be added to the OPEN TO BUY for that department.
![]() CHANGING
THE GENERAL LEDGER ACCOUNTS
CHANGING
THE GENERAL LEDGER ACCOUNTS
To set up or change the G/L accounts click on REPORTS and choose G/L accounts. Click on SHOW\CHANGE EXISTING ACCOUNT NAMES AND NUMBERS. You
will see a list of the current general ledger accounts that are in the
computer. Point to any one that you want to change and click.
First you will be asked for the account number. This can be any number up to
99999. It is best to use the same numbers that your accountant has been using
so you can compare historical costs to your old bookkeeping system. Then you
will be asked for the title of the count.
If you need more accounts than are available now, click on A/P ACCOUNTS again
but this time follow it by clicking on ADD NEW ACCOUNT
NAME AND NUMBER. You will be asked the same two questions and the information
will be added to the list.
![]() ORDERING
PRICE TAGS
ORDERING
PRICE TAGS
Price tags are available from quite a few sources. The one that many people use
is made by ARCH CROWN TAGS. They should be ordered 3 across. (That is 3 to a
horizontal row) They are available in 2 widths. We suggest the regular width.
The difference is how wide the center bar is on the tag. The wide width is for
wide bands and is easier for them. Usually the regular width can be used for
everything.
The tags come on pin-feed style of paper with holes on each edge so that the
printer can accurately adjust the position of the paper. We have found that an
impact printer does the best printing job.
Waterproof tags are best and if you can get waterproof ink for your printer
this will stand up better in stock. See the "HOW DO I" topic of
"ALIGN PRICE TAGS?".
If you are using a dedicated tag printer then you should use the tags that are
recommended by the manufacturer of the particular printer.
![]() NUMBER OF
COPIES OF A SALESSLIP OR ENVELOPE
NUMBER OF
COPIES OF A SALESSLIP OR ENVELOPE
To set the default number of copies for a saleslip or envelope go to the REPORTS screen and click on
PRINTER SETTINGS. Choose which default that you want.
To set the number of copies that you want to print to other than the default,
when you have the SALES or ENVELOPE screen showing, point and click on the
NUMBER OF COPIES label then point and click on the 0, 1, or 2 choices. This
will be the number printed until you leave the current screen. The default
number of copies will be reset to the default when you come back to that
screen.
![]() USING THE
CALCULATOR FOR WINJEWEL
USING THE
CALCULATOR FOR WINJEWEL
If you click on the calculator button on the far left of the screen, a small
calculator will appear on the screen. Use the mouse and click on the keys as
you would any small calculator. If you want to transfer the answer to your
calculations back to any spot in the WinJewel program that you want, click on "Copy
Answer".
Any inputbox on any WinJewel screen that is meant to
have dollars in it can then be double clicked to insert what was on the
calculator screen when you clicked on "Copy Answer".
For example, you might want to figure a discount when entering a sales slip on
the "Sales" screen. Click on the calculator icon to open the
calculator. Then do the math required. Then click on "Copy Answer".
Double click on the "Price" box and the answer to your calculation
will be filled in on the screen. When you press the enter key or click on any
other item on the screen, the amount will be formatted automatically to dollars
and cents.
![]() DIALING
AUTOMATICALLY
DIALING
AUTOMATICALLY
If you have a modem that is capable of dialing, you
can double click on any phone number in WinJewel and that number will be dialed
automatically.
To activate this feature, go to the REPORTS screen and choose "Dialer
Settings" and then choose "Turn On/Off automatic phone dialer feature".
You must also set the modem port from the same screen by clicking on
"Dialer Settings" and choosing "Set modem port".
To hang up the phone, double click on the same phone box that you started the
dialing process with.
![]() CHANGING
THE NUMBER ON A SALES SLIP
CHANGING
THE NUMBER ON A SALES SLIP
Sometimes you want to change the number on a sales
slip because you are using pre-numbered slips and writing the slips by hand.
These slips rarely get to you in numerical order if you are batch entering the
day's sales. If you point and click on the sales slip number on the sales
screen, you can enter the number that you want printed on the slip. This should
always be done first, before you "END LINE" any line of the sale,
because each line has the sales slip number stored with it.
![]() PRICE TAG
PRINTING
PRICE TAG
PRINTING
If you have a printer that only handles price tags (such as an Eltron, Allegro or Zebra brand of printers) then you can
print one tag at a time by clicking on the "Tag" button on the
"Inventory" screen when you have the information about a piece of
inventory on the screen.
If you are using a general-purpose printer then you will need to print a batch
of tags at one time. This is because the printer must handle a whole page of
tags at one time.
Whenever you enter a new item into stock (or change an existing item's
information) the computer will remember that item and print a new tag for that
item the next time that you ask for tags to be printed. You can also add to the
list of tags to be printed by clicking on the "Tag" button when you
have a piece of inventory on the "Inventory" screen.
You ask for tags to be printed by going to the "Reports" screen,
clicking on inventory reports, and then choosing "Price Tags".
You can also add to this list of tags to be printed by going to the
"Reports" screen clicking on inventory reports, and then choosing
"Choose tags to print". You can do several things with the list of
tags that are waiting to print:
* To clear the list of all items now waiting to print
enter 000.
* To add another item to the existing list, enter the supplier number then
enter the item number.
* To add all of one department's tags to the list, enter DEP.
* To add all of one supplier's tags to the list, enter
SUP.
* To print all of the items still showing as unsold, enter ALL.
* To add all of one location's tags to the list, enter LOC.
remember that only unsold inventory tags can be printed.
![]() SELECTING
CUSTOMER LABELS BY USING THE FINDBY ROUTINE
SELECTING
CUSTOMER LABELS BY USING THE FINDBY ROUTINE
You can use the "findby"
routine on the customer screen to create very specific label lists. To do this
you must:
* Enter the two words "MAILING LIST" in the phone box of the customer
screen.
* Click on the FINDBY gray button.
* Enter the criteria into one or more of the boxes to form a list.
* After the list is complete, go to the REPORTS screen.
* Choose the "Mailing List" group of reports.
* Click on "Findby Labels".
![]() PRINTING
THE AGE OF
PRINTING
THE AGE OF
You can code the age of your inventory to print on
each price tag. To choose this option you should go to the reports screen and
click on the INVENTORY REPORTS group of reports. Then click on the "Set
age of inventory to print on price tags".
The default code is a lower case letter to represent the month (a = Jan b =
Feb. etc) and a capital letter to represent the year. Some people like to have
a number for the year. This can be set by clicking on the year examples on the
screen and resetting the code to what you want. I personally like the
"a6" to represent Jan. '96. I think it is easy to understand.
The code that is put on the tags will be based on the "date
purchased" field on that inventory item.
![]() USING THE
DISCOUNT BUTTON
USING THE
DISCOUNT BUTTON
A button to figure discounts on sales is available by
going to the reports screen, choosing "Sales Reports", and choosing
"Make discount button visible on sales screen". The same choice can
be used to make the discount button invisible again.
To use the button, after you have entered a line of the sales slip and clicked
on either of the END LINE buttons, click on the "Discount" button.
The computer will ask for the percentage to be discounted. Valid answers are
from 1 to 99. The discount for the last line item on the slip will be shown in
the edit area of the screen. You can then change any part of the discount by
clicking on that part and changing that part or you can click on the
appropriate END LINE button. If the line item that is being discounted was
taxable then you should click on "End Line Tax". If the line was not
taxable you should click on "End Line no tax".
![]() HANDELING
GIFT CERTIFICATES
HANDELING
GIFT CERTIFICATES
If your store uses gift certificates on a regular
basis you should create a department for "Gift Certificates". Sales
of gift certificates should be entered like any other sale.
When the recipient brings the gift certificate back to the store, you will show
the gift certificate as a last line of the sales slip as a minus for the amount
of the gift certificate.
![]() CHANGING
THE BACKGROUND COLORS OF EACH SCREEN
CHANGING
THE BACKGROUND COLORS OF EACH SCREEN
The background color of each screen can be set by going to the REPORTS screen
and choosing "System Settings". Then click on "Set background
colors for each screen".
You can click on the name of the screen that you want to change and a selection
of colors will appear on the screen. Click on the color that you want to choose.
You can reset the default colors by choosing that choice.
You can choose all gray screens if you have a black & white monitor or you
just like gray. (Perhaps Dr. Freud would have something to say about this last
preference.)
![]() USING THE
FOLLOWUP FEATURE
USING THE
FOLLOWUP FEATURE
If you want to be able to be reminded to followup on a customer you have to activate this choice by
turning on the followup option. You can do this by
going to the "Reports" screen and choosing "System
Settings". Then you should click on the "Turn on or off the timed followup" choice and click on "Yes" or
"No".
Once you have activated the followup feature, you can
click on the "Followup" gray bar on the
"Sales", "Customers" or "Repair" screens to set a
followup for any customer. You will be reminded the
day and time that you have entered. A short note to remind you will also be
shown. When the reminder comes up you can choose any of the options shown by
clicking on that option.
![]() CHANGING
THE LABELS THAT YOU SEE ON EACH SCREEN
CHANGING
THE LABELS THAT YOU SEE ON EACH SCREEN
You can customize the labels on each screen of the
WinJewel program. To do this you go to the screen that you want to change and
type "CHANGE LABELS" into the first box that is large enough to take
the words. (On some screens this is not the first box.)
Each label will come up to be changed. If you want to make no change in that
label, just press the enter key or click on "OK". If you type
anything at all, what you typed will be the new label. You can see the labels
changing as you enter each one. Remember that you can move the box that is
taking the input for each label by pointing to the top bar of the box (usually
this is blue) and holding down the left button on the mouse as you move the
box. This will allow you to see things that would be under the box.
If you want to set the labels back to the default settings, go to the
"Reports" screen and click on "System Settings". Then you
can choose to reset "all" or just one screen's labels back to the
original settings.
![]() TO MARK ANY
ONE ACCOUNT TO NOT ALLOW CHARGE SALES
TO MARK ANY
ONE ACCOUNT TO NOT ALLOW CHARGE SALES
If you would like to be sure that any account does not have charges made to it,
you should put the "~" symbol somewhere in the street address line of
the account.
This will cause a red "NO CHARGES" to appear if this customer is
brought up onto either the CUSTOMER screen or the SALES screen.
It will be impossible for anyone to charge to a customer that has the
"~" symbol in the address line. If you want to override this at the
point of writing the sales slip, you will have to remove the "~"
before a charge can be written. This is true even if you are writing a return.
You can put the "~" back on the address line after the return is
written.
![]() ELIMINATE A
FORM LETTER
ELIMINATE A
FORM LETTER
To eliminate a form letter, go to the REPORTS screen, choose SYSTEM SETTINGS,
and then click on ERASE A FORM LETTER.
![]() TO MARK A
CUSTOMER AS A WHOLESALE CUSTOMER
TO MARK A
CUSTOMER AS A WHOLESALE CUSTOMER
If a customer always buys wholesale (with no sales
tax) you can mark this customer by going to the CUSTOMER screen, clicking on
DETAIL, and putting a check mark in the WHOLESALE box. This will cause that
customer to always be treated as a "no sales tax" status.
![]() UNLOCKING A
CUSTOMER'S FILE
UNLOCKING A
CUSTOMER'S FILE
If a customer's file is locked because the computer
thinks that another computer is using the file (but you are certain that no one
is using it), go to the customer screen and try to bring up that customer.
You will get a message that "This customer is being used by another
computer."
Choose "Unlock" and save the customer. The customer will be unlocked
and available on any other screen.
![]() BUYING
GROUPS
BUYING
GROUPS
If you belong to one or two buying groups that require
that you pay your invoices to the buying group, you can mark the suppliers that
are to be paid through either one of two groups that you name.
Define the name and address of each buying group by going to the reports screen
and choosing "Supplier Reports". Then choose "Set name and
address to pay asterisk invoices" or "Set name and address to pay
double asterisk invoices".
Mark each supplier that belongs to a group by adding either a single * or a
double ** at the end of the name of that supplier by using the supplier screen.
When you ask to pay invoices for any supplier with a single or double
"*" at the end of their name, the computer will substitute the name
and address of the buying group for the suppliers name and address when it
prints a check.
![]() MAKING A
DEPT. TAXABLE OR NOT You can set any one departments inventory to be
checked "Taxable" or "Non-Taxable". This setting is used
when a sales slip is being written.
MAKING A
DEPT. TAXABLE OR NOT You can set any one departments inventory to be
checked "Taxable" or "Non-Taxable". This setting is used
when a sales slip is being written.
Go to the REPORTS screen and click on "Inventory Reports". Then
choose "Set the taxable/non-taxable setting for each department".
Enter the first three letters of the department name. Then you will be asked if
you want this inventory's status to be taxable or non-taxable. The computer
will go through the inventory and mark all inventory per your instructions.
You can always override this setting when you are writing a sales slip, but the
computer will ask you "Are you sure?"
![]() SPLIT-PAY
AN INVOICE
SPLIT-PAY
AN INVOICE
If you want to pay just part of an invoice, go to the
CHECKBOOK screen. Choose the supplier that you want to pay. Choose the invoice
or invoices that you want to pay until you go over the amount that you want to
pay this supplier. (Start with the oldest invoices first.)
Then click on the "Split Pay" button. Enter the amount that you want
to pay of the last invoice on the list. (The other chosen invoices will be paid
in full) A new invoice will be added to the invoice list for this supplier with
the same invoice number but with the balance due after this payment.
You can now write the check as usual by clicking on the "Write Check"
or "Post Check" button. If you didn't want to write the check at this
time, you can leave the CHECKBOOK screen and the invoice will stay split for
later payment.
![]() MOVE SALES
SLIP
MOVE SALES
SLIP
If you want to move a sales slip from one customer's
account to another go to the reports screen and choose "Customer
Reports". Click on "Move sales slip from one customer to another".
This will set a flag to tell the computer that we are going to move a sales
slip. If for any reason you click on this and don't want to transfer a slip at
this time you will have to leave the WinJewel program on the computer that you
are using and restart WinJewel to unset the flag. After moving a slip the flag
is reset automatically and you don't have to leave the program. If you want to
move another slip you will have to go to "Customer Reports" again and
click on this choice again.
The program will give you directions as you proceed after you choose this
routine but here is a summary of what you will do. Go to the customer screen
and bring up the customer that the slip is to go to. Save that customer. Bring
up the customer that has the slip now and click on "See Slips"
button. Point to the slip that you want to transfer and click.
![]() PAID OUTS
PAID OUTS
To make a paid-out go to the "Reports" screen and click on
"Deposits/Paid Outs". Then choose "Paid Out". Enter the
date of the paid-out. Choose the G/L account from the list that the paid out
should be charged to. Enter a description of the paid out. Enter who the paid
out was paid to. Enter the Amount of the paid-out.
This paid out will show on the daily report for the day that you entered in
"date paid-out".
To clear the paid-outs from the system you need to convert them to an invoice
and write a check to "CASH" whenever you feel like it. Go to the
"Invoice" screen and click on "Clear PdOuts".
You will be asked if you want a printout of the list. Answer, "Yes"
and file the list with the paid-out receipts for an audit trail. A separate
invoice will automatically be made for each separate account that the paid outs
were assigned. In other words, one invoice might represent the total of many
individual paid-outs, but if the paid-outs represent 3 different G/L accounts,
3 invoices will be created.
The invoices that are automatically generated are assigned to supplier 998.
This is the supplier called "Temporary". To write a check for these
invoices, go to the "Checks" screen and click on "998
TEMPORARY" from the supplier list. Then click on each invoice that you
want to pay from the list. Click on "Print Check".
Enter the word "CASH" when asked who to make the check out to.
![]() SAVE
SAVE
The save button will not appear on the inventory screen if you have given the
user the access of "See Only" for the inventory screen. This access
is assigned using the "Staff" screen. The purpose of "See
Only" is to allow the staff member to look up inventory items but not
allow them to change any information about the inventory.
If a staff member has "See Only" access for
the inventory screen they also will not have a "Decode" button.
![]() SUPPLIER
LETTER
SUPPLIER
LETTER
To send a letter to a supplier, go to the supplier
screen and click on "Send Letter". You can then type in the body of a
letter and a closing. The heading, date, name and address will all be printed
automatically so you do not have to enter them.
To have the store's printed name & address at the top instead of the
store's logo, go to the "Reports" screen, choose "Printer
settings" and choose this option.
![]() ASKING A
QUESTION
ASKING A
QUESTION
There are 3 ways to ask WinJewel a question. (Not counting the easy way of
looking at the "How Do I?" list of the "Help" screen to see
if the question is already answered there.)
1 - Call direct to WinJewel's office at (425)
402-3495. We do not charge for our time but you pay for the phone call. We are
almost always in the office during normal west coast (
2 - Fax your question to WinJewel (425) 806-2976. Our fax machine will receive
24 hours a day but we will return answers by fax only during office hours. You
pay for the fax phone call to us and we will pay for the fax to you. There is
no charge for our time.
3 - Email your question to winjewel@msn.com. We will answer by Email. There is
no charge.
![]() CASH CUSTOMER
CASH CUSTOMER
When writing cash sale and you do not want to enter
the customer's name into the computer, you should enter the word
"CASH" into the box that usually takes the phone number.
Automatically "CASH" will be placed into the last name box and "
Care should be taken to not alter the first name, last name or phone number of
this fake customer. It is also important not to end up with a whole lot of
customers with just the last name "CASH" but to use this customer
each and every time that you don't want to record a name.
There is one other fake customer in the customer file. It is last name
"ZZZZZZZ" with a first name of "ZZZZZZ". The phone number
is "999-999-9999". This customer should not be used but it must stay
in the file to mark the highest name & phone number. Do not erase this
customer.
![]() MONTH END REPORTS
MONTH END REPORTS
At the end of each month a series of reports should be run to give to your
accountant and to keep on file for yourself. These reports are found on the
"Reports" screen under the heading of "End of Month".
When you run each report the date that you last ran that report will be beside
the name of the report on the "Reports" screen. If you bring all of
these dates to the same date by running each report, you can click on the line
"Monthly Balance Sheet" and get a trial balance sheet that will be as
accurate as the information that you have entered into the computer. Computer
users have a saying: "Garbage IN - Garbage OUT". This is why we
suggest that you still have your accountant or someone who is knowledgable about bookkeeping go over your figures. They
can check for logical inconsistencies and suggest changes based on tax
considerations.
While you are looking at the balance sheet you can set any figure on the sheet
by clicking on the line that you want to change and entering a corrected
figure. This is how you would enter things like depreciation that WinJewel does
not try to do for you. You can also balance the sheet by clicking on
"Click this line to balance balance sheet. You
can print the balance sheet by clicking on "Click this line to print balance
sheet".
![]() DEPARTMENT
TAG LAYOUTS
DEPARTMENT
TAG LAYOUTS
 You can set a different
layout for the inventory tags that are printed for each department. Go to the
reports screen and choose inventory reports. Click on the line that says
"TAGS - Set the alignment on price tags".
You can set a different
layout for the inventory tags that are printed for each department. Go to the
reports screen and choose inventory reports. Click on the line that says
"TAGS - Set the alignment on price tags".
In the bottom left corner of the screen you will see a button that says
"Change Order". Click on this button. You can set a different layout
for each department and one layout called "DEFAULT". Any department
that you do not specify a unique layout will use the "DEFAULT"
layout. You can reset the department layouts all back to the default setting by
clicking on the button in the lower right corner of the screen marked "Set
all back to default". Don't forget to click on "Save Change" at
the end of changing each department.
If you choose to save any department or a customized "DEFAULT"
setting, the font style of type for all tags will be changed to "Courier
New". This font allows each character to have the same width. There is no
way to choose any other font if you are using customized layout.
![]() LEAVING AN
EMPLOYEE A NOTE
LEAVING AN
EMPLOYEE A NOTE
You can leave a message for any employee who is listed
in the WinJewel system by clicking on the Timeclock
icon in the far upper right of the WinJewel screen.
Click on send, enter a message, click on who you want to send the message to
(as many as you want or All Employees) and click on your name as a sender. Then
click on Send Message.
The next time that the employee clicks on his or her name to
check in or out, they will be notified that they have a message. If they
click on Read Message they will see their message(s). They can erase any
message that they want by clicking on Erase Message.
![]() INVENTORY
PICTURES
INVENTORY
PICTURES
A digital camera or scanner can capture a picture of
any inventory item and transfer it to your hard disk.
The picture can be displayed when you have that inventory item on the Inventory
screen but first it must be copied to the inventory file with the other
descriptive information about that item. Have the item on the inventory screen
then click on the gray IMAGE button. Then enter the present location of the
picture of that item. (Or you can use the browse button to find the picture)
The area that accepts the name and location will be filled in with the last
picture name and location that you used. So if you use the same name and
location each time you scan or snap a picture then you won't have to enter it
again.
Once you have copied the picture to an inventory item, you can click on the
stores logo of the Inventory screen and it will be replaced with the image of
the inventory item.
If you click on the EXPAND gray button, the image will be expanded to the full
size of the image that is available. Clicking a second time on the same button
will shrink it back down to the smaller size.
Here is an example of moving a picture file to the inventory file:
(1) Capture a picture with a camera or a scanner.
(2) Save the picture file somewhere on your computer. This can be the hard disk
or a removable disk location. Remember the path to the file and the name that
you used to save it.
(3) In the WinJewel program on the Inventory screen, bring up the item that you
want to attach the picture.
(4) Once the item is on the screen, you will see a button that is only visible
when you have an item on the screen. It is the "Image" button that is
just over the picture area that probably has your store logo at this time.
Click on that button.
(5) Enter the path and file name into the space that is provided, or browse to
the file using the browse capability.
(6) Click on the OK button. You can now click on the Expand button to see the
whole picture. If you click on the same button again you will reduce the size
so that you can see the rest of the screen.
(7) Click on the Save button to save the information about the item. The
picture is now stored with the other information about that item.
![]() REPAIR
STANDARD PRICE LIST
REPAIR
STANDARD PRICE LIST
You can add a price list for standard service items by
going to the Service screen and clicking on the down arrow button that is just
to the right of the Description box.
You will see any existing list that is stored on your computer. Click on the
line that says: "Click this line to add a new item to the list"
You can now enter the description, cost, retail, number of days to usually
promise and who this type of service is usually assigned to.
When the person filling out the envelope clicks on the item, then the
appropriate boxes will be filled in automatically. Any of the entries can still
be changed by the person filling out the envelope before they click on Save or
Print.
![]() BRANCH STORE FILE TRANSFERING
BRANCH STORE FILE TRANSFERING
WinJewel uses the Internet to update branch store operations from and to the
main store. These transfers are handled automatically and will eliminate long
distance charges if you have local Internet service. You will need the"
Internet Transfer Module" from the WinJewel Company. This module takes
advantage of the Internet to keep each store's records updated at any interval
that you choose. The user can set the intervals from 1 to 1440 minutes. (1440
is the number of minutes in a 24-hour day)
If the other store is not available because the phone line or other Internet
connection line is out, then the information is stored and re-sent when the
other store is back on line.
The " Internet Transfer Module" is supplied
when you buy the Multiple-Store Version of WinJewel. This module must run in
the background on one computer in each store on a computer that has access to
the Internet. It can be minimized and still work correctly. The transfer
process does not effect other operations on this computer and other computers
on the local network, which is on a separate "Thread" of the
operating system.
The phone line will only be used each time that the module connects to the
Internet. We recommend a separate phone line be used. By this we mean NOT the
regular voice line for the store. A line that is also used for the fax machine
can be shared easily. The phone line that the store uses to clear credit card
sales is not recommended.
You will need to supply the Internet Email address of each of the other stores.
When a transaction is transferred to the receiving store then the inventory,
customer and sales files will be updated automatically. Accounts payable,
repair and checkbook transactions are not transferred.
![]() SETTING THE
TOOL TIP FEATURE
SETTING THE
TOOL TIP FEATURE
If you pause the mouse pointer over most things in the
WinJewel program a slight description of the object will appear. This is called
a "Tool Tip" and is a feature copied from many of the programs from
Microsoft. Most people find this is very handy for learning about the program
but it can get to be annoying to others, especially after they once know what
items are and how to use them. WinJewel allows you to turn this feature off by
going to the system settings.
You can always turn the Tool Tips back on if you want or if you have new
employees that need to learn the program by going back to system settings
again.
![]() PRINTING
ONE MAILING LABEL FROM THE SALES SCREEN
PRINTING
ONE MAILING LABEL FROM THE SALES SCREEN
If you do a lot of Internet or Mail business you may
want to be able to print a mailing label each time that you write a sales slip.
To enable this feature go to the System Settings screen and turn on this
feature by clicking on "Allow for Print Label Button on Sales
Screen".
After activating this feature you will see a small check box that is just over
the inventory number box. When this box is checked, a mailing label will be
printed each time that a sales slip is printed. The lapel will be printed using
a different printer than the one that produced the sales slip. You choose which
printer when you turn on the feature. You will also supply the font, font size
and spacing for the label.
If this feature is activated, you can also print a label for any customer by
going to the sales screen, bringing a customer onto the screen, and then
clicking on the words "Print Label". You do not have to be writing a
sales slip at the time. If you then click on "End Slip" the customer
will be erased from the screen.
![]() FILE
FORMATS
FILE
FORMATS
This information is provided for users who want
technical information about how the WinJewel data is stored. It has no use for
people who just want to use WinJewel to access the files but is provided for
technicians who want to use other programs, spreadsheets or text editors to
access the data.
Most files for WinJewel are stored in ASCII format for ease of export. The file
itself usually ends in .DAT and the corresponding file with the pointer
information is stored with a suffix of either .PT or .PTN. The first number in
the pointer file is the total number of records in the primary file. The second
number represents the number of records in the primary file the last time that
the file was sorted.
Since these are relative files, position means everything. It is very important
that you do not replace any information in a file with information of a
different length. All records in the file could be affected. It is always best
to make a copy of the file and work with the copy.
FILE: INVENT.DAT
POINTER: INVENT.PTN
Ven1 As String * 3
Num1 As String * 5
Desc1 As String * 80
Center1 As String * 5
StoneColor1 As String * 1
Clarity1 As String * 4
Cut1 As String * 3
Shape1 As String * 1
Tax1 As String * 1
TW1 As String * 5
ReOrd1 As String * 15
Grams1 As String * 6
Karat1 As String * 2
Color1 As String * 1
DatePur1 As String * 8
Invnum1 As String * 15
DateSold1 As String * 8
Cust1 As String * 13
Multiple1 As String * 1
LastNote1 As String * 6
CustNum1 As String * 5
SlipNum1 As String * 7 ' the location of inventory item in file until
transferred to month file
Memo1 As String * 1 ' "Y" = memo others=last inventory code
Dept1 As String * 3
Cost1 As String * 12
Retail1 As String * 12
soldfor1 As String * 12
SerialNum1 As String * 12
AutoReorder1 As String * 1
FILE: MMYY.DAT
FILE: MMYY.PT
cust2 As String * 5
lastmmyy2 As String * 4
lastslip2 As String * 8
ven2 As String * 3
stocknum2 As String * 5
desc2 As String * 24
price2 As String * 8
dept2 As String * 3
date2 As String * 8
type2 As String * 1
taxable2 As String * 8 ' if wholesale then 2 for quantity 6 for inv number
clerk2 As String * 1
slipnum2 As String * 8
split2 As String * 5 ' up to 5 clerks if X in clerk
taxcode2 As String * 1 ' B=Both P=Pst G=Gst Canadian flag
expansion2 As String * 2
FILE CUST.DAT
POINTER CUST.PTN
lastname3 As String * 20
firstname3 As String * 25
address3 As String * 24
status3 As String * 1
' if asc(cust.status3) mod 2 then it is locked
' if asc(cust.status3) and 2 = true then no
statements
' if asc(cust.status3) and 4 = true then no mailing
list
' if asc(cust.status3) and 8 = true then
' if asc(cust.status3) and 16 = true then no charges
' if asc(cust.status3) and 32 = true then never
interest
' if asc(cust.status3) and 64 = true then no checks
' if asc(cust.status3) and 128 = true then wholesale
customer
city3 As String * 20
state3 As String * 2
zip3 As String * 10
lastmmyy3 As String * 4
lastslip3 As String * 8
balance3 As String * 8
agreedpmt3 As String * 8 ' is the old acct number if large = "Y"
phone3 As String * 12
phoneTwo3 As String * 12
lastnote3 As String * 6
credlimit3 As String * 8 'total sales in large
number3 As String * 5 'if number3 = 0 then in use
profile3 As String * 8
behind3 As String * 4 'interest in large
nointerest3 As String * 2 'ref by in large
InterestRate3 As String * 5
address31 As String * 24
expansion3 As String * 6
FILE: SUPP.DAT
POINTER: SUPP.PT
name4 As String * 25
address4 As String * 40
city4 As String * 20
state4 As String * 2
zip4 As String * 10
phone4 As String * 12
fax4 As String * 12
lastnum4 As String * 6
balance4 As String * 8
lastinv4 As String * 8
terms4 As String * 14
lastnote4 As String * 6
number4 As String * 3
acctnum4 As String * 15
salesperson4 As String * 25
salespersonphone4 As String * 12
mailinglabels4 As String * 1
exp4 As String * 24
FILE: Note.dat
POINTER: Note.PT
custsupnum5 As String * 5
newnote5 As String * 80
lastnotnum5 As String * 6
date5 As String * 8
FILE: REPAIR.DAT
POINTER: REPAIR.PTN
cust6 As String * 17
dept6 As String * 3
cnum6 As String * 5
item6 As String * 25
instr6 As String * 24
salesperson6 As String * 1
who6 As String * 2
indate6 As String * 8
outdate6 As String * 8
duedate6 As String * 8
findate6 As String * 8
where6 As String * 6
est6 As String * 8
price6 As String * 8
lastnote6 As String * 6
envnumber6 As String * 6
salesslip6 As String * 6
cost6 As String * 10
expand6 As String * 30
FILE: STAFF.DAT
POINTER: STAFF.PT
code7 As String * 5
initial7 As String * 1
name7 As String * 25
access7 As String * 12
ssnum7 As String * 12
address7 As String * 25
city7 As String * 20
state7 As String * 2
zip7 As String * 10
phone7 As String * 12
exemptions7 As String * 2
status7 As String * 2
reportaccess7 As String * 21
FILE: INVOICE.DAT POINTER: INVOICE.PT
number8 As String * 25
date8 As String * 8
datedue8 As String * 8
amount8 As String * 8
discount8 As String * 8
dept8 As String * 3
shipping8 As String * 8
datepaid8 As String * 8
cknum8 As String * 6
name8 As String * 25
supNumber8 As String * 3
canada8 As String * 8
dept2part8 As String * 3
monthly8 As String * 1
expand8 As String * 26
FILE: DEPT.DAT
POINTER: DEPT.PT
Commision9 As String * 3
Longdept9 As String * 25
Category9 As String * 3
Percentage9 As String * 2
BalanceDept9 As String * 8
FILE AP.DAT
POINTER AP.PT
name10 As String * 50
number10 As String * 6
balance10 As String * 12
budget10 As String * 12
category10 As String * 3
expan10 As String * 17
FILE CBMMYY.DAT
POINTER CBMMYY.PT
supnumber11 As String * 3
name11 As String * 25
invnumber11 As String * 25
account11 As String * 6
cknumber11 As String * 6
datepaid11 As String * 8
amount11 As String * 12
discount11 As String * 12
shipping11 As String * 8
status11 As String * 1
expand11 As String * 20
FILE ORDER.DAT
POINTER ORDER.PT
supnumber12 As String * 3
ordernumber12 As String * 5
orderdate12 As String * 8
promisedate12 As String * 8
indate12 As String * 8
deliverdate12 As String * 8
instruct12 As String * 25
item12 As String * 40
terms12 As String * 14
cust12 As String * 5
cost12 As String * 8
dept12 As String * 3